
Water Damaged Wood Floor? Here’s the Cure: A Comprehensive Guide to Restoration
A water-damaged wood floor can be a homeowner’s nightmare. Whether it’s from a burst pipe, a leaky appliance, or a catastrophic flood, water damage can wreak havoc on your beautiful hardwood floors. But before you despair and consider a complete replacement, there’s often hope. This comprehensive guide will walk you through the steps to assess, address, and ultimately restore your water-damaged wood floor, giving you the tools and knowledge to bring your flooring back to its former glory.
The good news is that with prompt action and the right approach, many water-damaged wood floors can be saved. The key is understanding the extent of the damage and acting quickly. This guide provides a detailed overview of the process, from initial assessment to final restoration, ensuring you have the best chance of a successful outcome. We’ll cover everything from identifying the type of damage to choosing the appropriate repair methods, empowering you to make informed decisions and potentially save thousands of dollars.
Assessing the Damage: A Critical First Step
Before you can begin the restoration process, it’s crucial to accurately assess the extent of the water damage. This assessment will determine the best course of action and help you avoid unnecessary work. Time is of the essence when dealing with a water-damaged wood floor, as the longer the water sits, the more damage it causes. Here are the key things to look for:
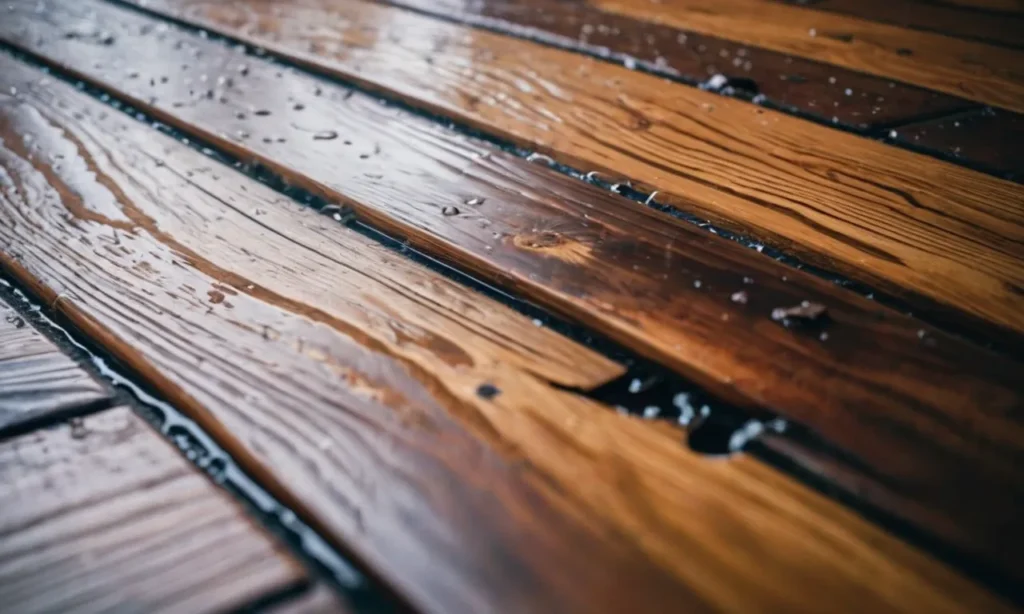
- Visual Inspection: Start by visually inspecting the affected area. Look for signs of cupping (where the edges of the boards are higher than the center), crowning (where the center of the boards are higher than the edges), buckling (where the floorboards are raised and uneven), and warping. Also, check for discoloration, staining, and any signs of mold or mildew. A water-damaged wood floor often exhibits these visual cues.
- Moisture Meter: Use a moisture meter to determine the moisture content of the wood. This tool will give you a more precise understanding of how wet the wood is and whether the damage is superficial or has penetrated deeply. A moisture meter is an invaluable tool for assessing a water-damaged wood floor.
- Type of Wood: Consider the type of wood your floor is made of. Some wood species are more resistant to water damage than others. Solid hardwood floors are generally more susceptible to damage than engineered wood floors, which are constructed with a plywood core. Knowing the wood type will influence your restoration approach.
- Source of Water: Understanding the source of the water is also important. Was it clean water from a burst pipe, or was it contaminated water from a sewage backup? The source of the water will impact the cleaning and sanitation steps required.
A thorough assessment will help determine the severity of the water damage to your wood floor. Addressing a water-damaged wood floor requires a clear understanding of the situation.
Immediate Actions: What to Do Right Away
Once you’ve assessed the damage, it’s time to take immediate action to minimize further damage. The faster you act, the better the chances of a successful restoration. These steps should be taken as quickly as possible after discovering a water-damaged wood floor:
- Stop the Water Source: If possible, immediately stop the source of the water leak. This could involve turning off the water supply to a broken pipe or fixing a leaky appliance.
- Remove Standing Water: Remove any standing water from the surface of the floor as quickly as possible. Use a wet/dry vacuum, mops, and towels to absorb the water. This helps prevent further absorption into the wood.
- Ventilation and Drying: Open windows and doors to promote air circulation. Use fans to speed up the drying process. Dehumidifiers are also highly recommended to remove moisture from the air and prevent mold growth. Proper ventilation and drying are critical for a water-damaged wood floor.
- Remove Furniture and Rugs: Remove furniture and rugs from the affected area to prevent them from absorbing moisture and to allow for better air circulation.
- Contact Your Insurance Company: If the damage is significant, contact your insurance company to report the damage and initiate a claim. They may send an adjuster to assess the damage and guide you through the claims process.
These immediate actions are essential to mitigate the effects of the water damage to your wood floor. Time is of the essence; the sooner you act, the better your chances of saving the floor.
Drying Your Wood Floor: The Crucial Process
Drying is the most critical step in restoring a water-damaged wood floor. The goal is to remove moisture from the wood to prevent further damage, such as mold growth, and to allow the wood to return to its original dimensions. The drying process can take several days to several weeks, depending on the severity of the damage and the environmental conditions. Here’s what you need to know:
- Air Circulation: Maximize air circulation by opening windows and doors and using fans. Direct fans across the floor surface to promote evaporation.
- Dehumidifiers: Use dehumidifiers to remove moisture from the air. Place dehumidifiers in the affected area and monitor the humidity levels. Aim for a relative humidity of 30-50%.
- Temperature: Maintain a consistent temperature in the room. Avoid extreme temperature fluctuations, as these can exacerbate the damage.
- Monitoring: Regularly monitor the moisture content of the wood using a moisture meter. The wood should reach its normal moisture content before proceeding with any repairs.
- Professional Help: In cases of severe water damage, consider hiring a professional water damage restoration company. They have specialized equipment, such as industrial-grade dehumidifiers and air movers, to expedite the drying process and ensure that the wood is dried properly.
Proper drying is vital to restoring a water-damaged wood floor. This will prevent mold growth and allow the wood to return to its original dimensions.
Repairing the Damage: A Step-by-Step Guide
Once the wood floor is completely dry, it’s time to repair the damage. The repair methods will depend on the extent of the damage. Minor damage may only require sanding and refinishing, while more severe damage may require replacing entire sections of the floor. Here’s a general guide:
- Sanding and Refinishing: For minor cupping or surface damage, sanding and refinishing may be sufficient. Sand the floor to remove the damaged finish and any surface imperfections. Then, apply a new finish to protect the wood. This is a common method for dealing with a water-damaged wood floor.
- Board Replacement: If individual boards are severely damaged (e.g., heavily warped, buckled, or showing signs of rot), they will need to be replaced. Carefully remove the damaged boards and replace them with new boards of the same type and dimensions. Ensure the new boards are properly installed and matched to the existing floor.
- Subfloor Inspection: Inspect the subfloor for any damage. Water damage can also affect the subfloor. Replace any damaged sections of the subfloor before reinstalling the flooring.
- Mold Remediation: If mold is present, it must be removed before proceeding with any repairs. Hire a professional mold remediation company to safely remove the mold and prevent it from spreading. Mold can be a serious health hazard and should be addressed promptly.
- Acclimation: After replacing any boards, allow the new wood to acclimate to the environment for several days before sanding and finishing. This will help ensure that the new wood matches the existing floor.
Repairing the damage is the next step in restoring a water-damaged wood floor. It involves addressing the specific issues and ensuring that the floor is structurally sound and aesthetically pleasing.
Finishing and Protecting Your Restored Floor
Once the repairs are complete, it’s time to finish and protect your restored wood floor. The right finish will not only enhance the beauty of your floor but also protect it from future damage. Here are some finishing and protection tips:
- Choose the Right Finish: Select a durable finish that is suitable for your wood type and lifestyle. Options include polyurethane, oil-based finishes, and water-based finishes. Consider the pros and cons of each type before making a decision.
- Apply the Finish: Follow the manufacturer’s instructions to apply the finish. Typically, this involves sanding the floor to a smooth surface, applying multiple coats of finish, and allowing each coat to dry completely.
- Protect from Water: Take steps to protect your floor from future water damage. Use doormats at entrances to catch water and debris, and promptly clean up any spills.
- Regular Maintenance: Regularly clean and maintain your wood floor to keep it looking its best. Sweep or vacuum the floor regularly to remove dirt and debris. Use appropriate cleaning products and avoid harsh chemicals.
- Consider a Water-Resistant Sealant: For added protection, consider applying a water-resistant sealant to your floor. This can help prevent water from penetrating the wood and causing damage.
Finishing and protecting your restored floor is essential to ensure its longevity and maintain its beauty. Following these tips will help you keep your water-damaged wood floor looking great for years to come.
When to Call the Professionals
While many homeowners can successfully repair a water-damaged wood floor on their own, there are times when it’s best to call in the professionals. Here are some situations where professional help is recommended:
- Extensive Damage: If the water damage is extensive, involving a large area of flooring, it’s best to consult with a professional. They have the expertise and equipment to handle complex repairs.
- Mold Growth: If there is significant mold growth, it’s crucial to hire a professional mold remediation company. Mold can be a health hazard and requires specialized removal techniques.
- Uncertainty: If you are unsure about any step in the restoration process, it’s always a good idea to seek professional advice. A professional can assess the damage and recommend the best course of action.
- Insurance Claims: If you are filing an insurance claim, your insurance company may require you to use a professional restoration company.
- Time Constraints: If you are short on time or lack the necessary skills, hiring a professional can save you time and ensure that the job is done correctly.
Knowing when to call the professionals can save you time, money, and stress. A professional can provide expert guidance and ensure that your water-damaged wood floor is restored properly.
Preventing Future Water Damage
Once you’ve successfully restored your water-damaged wood floor, you’ll want to take steps to prevent future water damage. Prevention is always the best medicine. Here are some tips:
- Regular Inspections: Regularly inspect your home for potential water leaks. Check plumbing fixtures, appliances, and the roof for any signs of leaks or damage.
- Maintain Plumbing: Regularly maintain your plumbing system. Ensure that pipes are properly insulated and that there are no leaks. Address any plumbing issues promptly.
- Protect Appliances: Inspect appliances, such as washing machines and dishwashers, for leaks. Use drip pans under appliances to catch any potential leaks.
- Install Water Sensors: Consider installing water sensors in areas prone to water leaks, such as under sinks and near appliances. These sensors can alert you to leaks before they cause significant damage.
- Consider Waterproofing: In high-risk areas, such as basements, consider waterproofing measures to prevent water from entering your home.
Preventing future water damage is crucial to protecting your investment in your wood floors and your home. Taking these steps will help you avoid the heartache and expense of dealing with a water-damaged wood floor in the future.
Conclusion: Restoring Your Floor, Restoring Your Peace of Mind
Dealing with a water-damaged wood floor can be a stressful experience. However, with the right knowledge and approach, you can successfully restore your floors and bring them back to their original beauty. This guide has provided a comprehensive overview of the process, from assessing the damage to repairing and protecting your floor. Remember to act quickly, assess the damage accurately, and take the necessary steps to dry and repair the floor. Whether you choose to tackle the project yourself or hire a professional, understanding the process will empower you to make informed decisions and achieve a successful outcome.
By following the steps outlined in this guide, you can not only restore your water-damaged wood floor but also protect your investment and regain your peace of mind. Don’t let water damage ruin your beautiful hardwood floors. With the right approach, you can bring your floors back to their former glory. [See also: How to Choose the Right Wood Floor Finish] and [See also: Understanding Engineered Wood vs. Solid Hardwood]. Dealing with a water-damaged wood floor is a challenge, but it’s a challenge that can be overcome with the right information and effort.

