The Secret to Creating Stunning Grayscale Images in Simple Steps
In the ever-evolving landscape of digital imagery, the allure of grayscale photography remains timeless. The absence of color forces the viewer to focus on the fundamental elements of a photograph: composition, texture, light, and shadow. But how do you transform a vibrant color image into a captivating black and white masterpiece? This article unveils the secret to creating stunning grayscale images in a few simple steps, equipping you with the knowledge to elevate your photography to new heights.
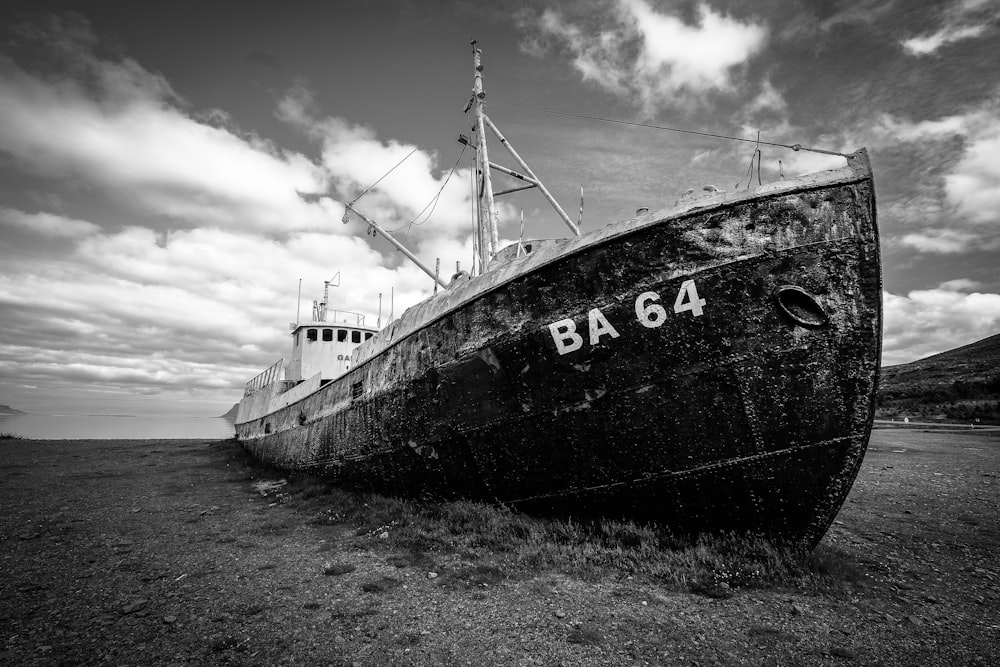
The power of grayscale lies in its ability to strip away distractions, allowing the essence of a scene to shine through. By eliminating the vibrant hues that often dominate our visual experience, grayscale images draw the eye to the interplay of light and shadow, the subtle nuances of texture, and the overall composition. This focus can evoke a sense of nostalgia, drama, or artistic expression that color images sometimes struggle to achieve. Mastering the art of grayscale conversion is a valuable skill for any photographer, regardless of their experience level.
Understanding the Fundamentals of Grayscale
Before diving into the practical steps, it’s crucial to grasp the underlying principles. Grayscale images are not simply images with the color removed. They are meticulously crafted representations of light and shadow, where each pixel’s value corresponds to its brightness. This brightness is measured on a scale from black (0) to white (255), with various shades of gray in between. The art of grayscale conversion lies in manipulating these values to create a visually compelling image.
The human eye perceives different colors as having different levels of brightness. For instance, yellow appears brighter than blue, even if they have the same intensity of light. This is where the conversion process becomes crucial. A well-executed grayscale conversion considers the relative brightness of each color in the original image, ensuring that the final grayscale image accurately reflects the scene’s tonal values. The secret to creating stunning grayscale images is in understanding how to control these tonal values.
Step-by-Step Guide to Grayscale Conversion
Creating a compelling grayscale image involves several key steps. Here’s a breakdown of the process, suitable for both beginners and seasoned photographers:
- Choose Your Image: Select an image with strong composition, interesting textures, and contrasting light and shadow. Landscapes, portraits, and street photography often lend themselves well to grayscale conversion. Consider the subject matter and how it might translate without color. A good starting point is to select an image with a clear focal point and well-defined shadows.
- Open Your Image in an Image Editing Software: Popular choices include Adobe Photoshop, GIMP (a free alternative), or Lightroom. Most image editing software offers a variety of grayscale conversion options.
- Explore Conversion Methods: There are several methods for converting a color image to grayscale, each with its own strengths and weaknesses. Understanding these methods is key to mastering the secret to creating stunning grayscale images.
- Grayscale Mode: This is the simplest method. In Photoshop, you can go to Image > Mode > Grayscale. This method often results in a flat-looking image, lacking the tonal range and depth of other methods. It essentially discards the color information and assigns a grayscale value based on the perceived luminance of the original color.
- Desaturate: Found under Image > Adjustments > Desaturate, this method converts the image to grayscale by removing the color information. It calculates the average of the red, green, and blue values for each pixel and assigns that average to the grayscale value. While simple, it can also result in a flat image.
- Black & White Adjustment Layer: This is the most versatile and recommended method. In Photoshop, create a Black & White adjustment layer (Layer > New Adjustment Layer > Black & White). This allows you to control the grayscale conversion process by adjusting the relative brightness of individual colors in the original image. For example, you can make reds appear darker or yellows appear brighter. This method is the key to unlocking the secret to creating stunning grayscale images.
- Channel Mixer: Another powerful method is the Channel Mixer (Image > Adjustments > Channel Mixer). This allows you to create a grayscale image by mixing the red, green, and blue channels. You can control the contribution of each color channel to the final grayscale image, giving you a high degree of control over the tonal values.
- Fine-Tune Tonal Values: Once you’ve chosen a conversion method, it’s time to refine the tonal values. Use the Levels or Curves adjustment tools to adjust the contrast and brightness of the image. Levels allows you to set the black point, white point, and midtones, while Curves provides more granular control over the tonal range. Experiment with these tools to create the desired mood and atmosphere. This is a crucial step in achieving the secret to creating stunning grayscale images.
- Sharpen the Image: Grayscale images often benefit from a touch of sharpening to enhance their details and textures. Use the Unsharp Mask filter or other sharpening tools to bring out the details, but avoid over-sharpening, which can create unwanted artifacts.
- Consider Adding Grain: In some cases, adding a subtle amount of grain can enhance the aesthetic appeal of a grayscale image, especially if you’re aiming for a vintage or film-like look.
- Save Your Image: Save your final image in a suitable format, such as JPEG or TIFF, depending on your needs.
Mastering the Black & White Adjustment Layer
As mentioned earlier, the Black & White adjustment layer in Photoshop is arguably the most powerful tool for grayscale conversion. This method allows you to precisely control how each color in the original image is converted to grayscale. Here’s how to use it effectively:
- Create the Adjustment Layer: In Photoshop, go to Layer > New Adjustment Layer > Black & White.
- Adjust Color Sliders: You’ll see sliders for each color in the original image (reds, yellows, greens, cyans, blues, magentas). Moving these sliders allows you to control how each color contributes to the grayscale image. For example, if you want to make a blue sky appear darker, move the blue slider to the left. Conversely, moving the slider to the right will make the sky appear brighter. This is a vital element of the secret to creating stunning grayscale images.
- Experiment and Observe: The key to mastering this technique is experimentation. Play with the sliders and observe how each adjustment affects the image’s tonal values. Consider how each color in the original image contributes to the overall composition and adjust the sliders accordingly.
- Use Presets as a Starting Point: The Black & White adjustment layer also offers several presets that you can use as a starting point. These presets can give you a quick and easy way to achieve different grayscale looks. Experiment with these presets and then customize them to your liking.
Tips for Creating Compelling Grayscale Images
Beyond the technical aspects, here are some tips to help you create truly compelling grayscale images:
- Consider the Subject: Some subjects lend themselves better to grayscale than others. Strong compositions, dramatic lighting, and interesting textures often work well.
- Pay Attention to Composition: Grayscale images rely heavily on composition. Use leading lines, the rule of thirds, and other compositional techniques to create visually engaging images.
- Focus on Light and Shadow: The interplay of light and shadow is crucial in grayscale photography. Look for scenes with strong contrast and well-defined shadows.
- Embrace Texture: Textures can add depth and interest to grayscale images. Look for images with interesting textures, such as brick walls, weathered wood, or fabrics.
- Experiment with Different Conversion Methods: Don’t be afraid to experiment with different conversion methods to find the one that best suits your image.
- Practice, Practice, Practice: The more you practice, the better you’ll become at creating compelling grayscale images. Experiment with different subjects, lighting conditions, and conversion methods. The secret to creating stunning grayscale images is in consistent practice.
- Seek Inspiration: Study the work of master grayscale photographers. Analyze their techniques and learn from their compositions and use of light and shadow.
The Final Word: Unlocking the Secret
Creating captivating grayscale images is a rewarding process. By understanding the fundamentals, mastering the techniques, and practicing regularly, you can transform ordinary images into stunning works of art. The secret to creating stunning grayscale images lies in understanding and controlling the tonal values, paying close attention to composition, and embracing the power of light and shadow. Armed with these simple steps, you are now well-equipped to embark on your grayscale photography journey. Remember, the key is to experiment, learn, and most importantly, have fun. Grayscale photography can offer a unique perspective, allowing you to see the world in a new light, or rather, in new shades of gray. By understanding the process, you’ve unlocked the secret to creating stunning grayscale images. Now go out and create!
[See also: Best Practices for Landscape Photography, Mastering Portrait Photography Techniques, Understanding the Rule of Thirds]

