
The No-Nonsense Guide to RV Chassis Battery Charging: Keeping Your Adventure Rolling
The open road beckons, the engine purrs, and the promise of adventure hangs in the air. For RV enthusiasts, the journey is the destination. But before you hit that iconic highway, there’s a crucial element that often gets overlooked: the RV chassis battery. This unassuming power source is the unsung hero, responsible for starting your engine and powering essential systems. Understanding RV chassis battery charging is not just about convenience; it’s about ensuring your safety and the longevity of your beloved recreational vehicle. This guide provides a no-nonsense approach to RV chassis battery charging, offering practical advice and insights to keep your adventures rolling smoothly.
Understanding the RV Chassis Battery
Before diving into charging, let’s clarify what an RV chassis battery is. Unlike the house batteries that power your lights, appliances, and entertainment systems, the chassis battery, also known as the starting battery, is dedicated to one primary function: starting your RV’s engine. It’s typically a 12-volt lead-acid battery, similar to those found in cars, and it’s crucial for getting your RV moving. Without a functioning chassis battery, your RV is going nowhere.
The chassis battery is vital. It’s the heart of your RV’s starting system. It’s also the unsung hero, working behind the scenes to ensure your engine turns over reliably, regardless of weather conditions or how long your RV has been idle. Failure to maintain this battery can lead to frustrating delays, costly repairs, and even stranding you in remote locations. Therefore, understanding the basics of RV chassis battery charging is essential for any RV owner.
Why Proper Charging Matters
Why is proper RV chassis battery charging so important? Several reasons contribute to the need for vigilance:
- Preventing Battery Sulfation: Lead-acid batteries suffer from sulfation if left in a discharged state for extended periods. This buildup of sulfate crystals on the battery plates reduces its capacity and lifespan. Regular charging prevents this process.
- Extending Battery Life: Proper charging techniques, including using the right charger and avoiding overcharging, significantly extend the life of your chassis battery, saving you money in the long run.
- Ensuring Reliability: A fully charged battery ensures that your engine starts reliably, eliminating the risk of being stranded due to a dead battery.
- Maintaining Performance: A well-maintained battery provides consistent voltage, ensuring that your RV’s electrical systems function optimally.
Charging Methods: Your Options Explained
There are several ways to charge your RV chassis battery, each with its advantages and disadvantages. Choosing the right method depends on your RV’s setup, your travel style, and your personal preferences.
Charging While Driving
One of the most convenient methods is charging while driving. Your RV’s alternator charges the chassis battery as you drive. This is the primary charging method for most RVs. However, the alternator may not always fully charge the battery, especially during short trips. Also, the alternator is designed primarily to charge the chassis battery, and it may not efficiently charge house batteries, especially if they are a different type of battery.
Using a Converter/Charger
Many RVs come equipped with a converter/charger. This device converts shore power (AC) to DC power to charge the house batteries and, in some cases, the chassis battery. While convenient, the converter/charger may not always charge the chassis battery optimally. Some older converters may not provide a proper charging profile for modern batteries.
Using a Dedicated Battery Charger
A dedicated battery charger is a standalone device specifically designed for charging batteries. This offers the most control over the charging process. You can choose a charger with a multi-stage charging profile, which optimizes charging for different battery types and conditions. This is a highly recommended method for RV chassis battery charging.
Solar Charging
Solar panels can also be used to charge your chassis battery, especially if you have a solar charging system installed for your house batteries. This is an eco-friendly and convenient option for maintaining your chassis battery while boondocking or storing your RV. It’s a great way to keep your battery topped up, especially during periods of inactivity.
Choosing the Right Charger
Selecting the right charger is critical for effective and safe RV chassis battery charging. Consider the following factors:
- Battery Type: Ensure the charger is compatible with your battery type (lead-acid, AGM, gel, etc.). Different battery types require different charging profiles.
- Charging Amperage: The charger’s amperage rating determines how quickly it charges the battery. A higher amperage charger charges faster, but avoid charging too quickly as it can damage the battery. Consult your battery’s specifications for the recommended charging rate.
- Charging Stages: Look for a charger with a multi-stage charging profile (bulk, absorption, float). This ensures optimal charging and prevents overcharging.
- Safety Features: Choose a charger with safety features like reverse polarity protection, overcharge protection, and short-circuit protection.
Step-by-Step Charging Guide
Here’s a step-by-step guide to safely and effectively charging your RV chassis battery using a dedicated battery charger:
- Safety First: Always wear safety glasses and gloves when working with batteries. Work in a well-ventilated area.
- Locate the Battery: Identify your RV chassis battery. It’s typically located under the hood, in a compartment, or near the engine.
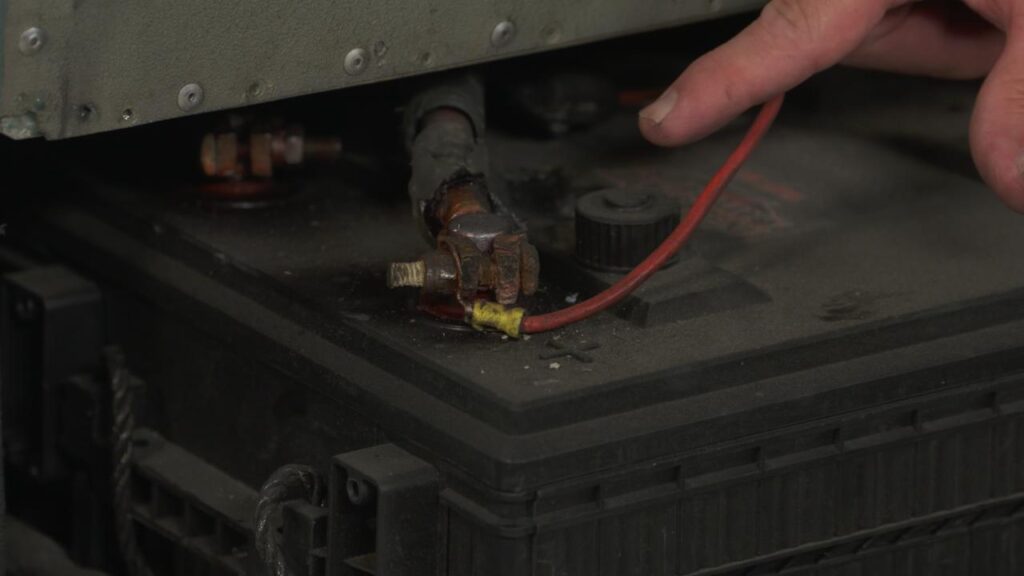
- Clean the Terminals: Inspect the battery terminals for corrosion. Clean them with a wire brush or a battery terminal cleaner if necessary. This ensures a good connection.
- Connect the Charger: Connect the positive (red) clamp of the charger to the positive terminal of the battery. Connect the negative (black) clamp of the charger to the negative terminal of the battery.
- Set the Charger: Select the appropriate charging setting on the charger based on your battery type and size.
- Start Charging: Plug the charger into a power outlet and turn it on.
- Monitor the Charging Process: Observe the charger’s display. It will indicate the charging stage and the battery’s voltage.
- Disconnect the Charger: Once the battery is fully charged (indicated by the charger), unplug the charger and disconnect the clamps from the battery terminals.
- Check the Battery: After charging, check the battery’s voltage with a multimeter to ensure it’s fully charged (around 12.6 volts or higher).
Troubleshooting Common Charging Issues
Even with the best intentions, you might encounter some issues during RV chassis battery charging. Here’s how to troubleshoot some common problems:
- Battery Not Charging: Check the charger’s connections, the power outlet, and the charger’s fuse. The battery may also be severely discharged or damaged.
- Charger Overheating: Ensure the charger is in a well-ventilated area. The charger may be overloaded or faulty.
- Battery Not Holding a Charge: The battery may be sulfated, damaged, or nearing the end of its lifespan. A load test can help determine the battery’s condition.
- Charging Too Slowly: The charger may be too small for the battery, or the battery may be severely discharged.
Maintenance and Storage Tips
Proper maintenance and storage are essential for extending your chassis battery’s life and ensuring reliable starting power. Here are some helpful tips:
- Regular Inspection: Inspect your battery regularly for corrosion, leaks, and physical damage.
- Clean Terminals: Keep the battery terminals clean to ensure a good electrical connection.
- Use a Battery Tender: If you store your RV for extended periods, use a battery tender or trickle charger to maintain the battery’s charge.
- Disconnect the Battery: If you’re not using your RV for a long time, consider disconnecting the battery to prevent parasitic drain.
- Proper Storage: Store the battery in a cool, dry place. Avoid extreme temperatures.
The Importance of Regular RV Chassis Battery Charging
Maintaining your RV chassis battery is a proactive step toward ensuring the reliability and longevity of your RV. Understanding the nuances of RV chassis battery charging empowers you to keep your RV running smoothly and safely. It allows you to address potential issues before they become major problems, preventing costly repairs and ensuring you’re always ready for your next adventure. By following the guidelines outlined in this guide, you can take control of your RV’s power system and enjoy the freedom of the open road with confidence.
Investing in proper RV chassis battery charging is an investment in your peace of mind. It’s a small price to pay for the assurance that your RV will start when you need it, allowing you to embrace the joys of RV travel without worry. Remember, a well-maintained chassis battery is the foundation of a reliable RV experience. Prioritize RV chassis battery charging and enjoy the journey!
RV chassis battery charging is a critical aspect of RV ownership that should not be overlooked. By understanding the importance of proper charging, selecting the right charger, and following a regular maintenance schedule, you can ensure that your chassis battery provides reliable power for years to come. This guide has provided a no-nonsense approach to RV chassis battery charging, covering the essential aspects of this vital maintenance task. Now, go forth and explore with the confidence that comes from knowing your RV is ready for the road!
[See also: Related Article Titles]

