Stop the Noise: A Comprehensive Lazy Susan Adjustment Guide for Smooth Operation
The kitchen is the heart of the home, a place for culinary creativity, family gatherings, and quiet moments of reflection. But what happens when the peace is shattered by a grating screech or a stubborn spin? The culprit is often the humble Lazy Susan, a rotating storage solution designed to maximize space and accessibility. This essential guide provides a comprehensive roadmap to silencing the noise and ensuring your Lazy Susan operates smoothly and efficiently. We’ll delve into the common issues, explain the underlying mechanics, and walk you through the practical steps to achieve a perfect spin.
Understanding the Anatomy of a Lazy Susan
Before we begin the troubleshooting, it’s crucial to understand the basic components of a Lazy Susan. Typically, a Lazy Susan consists of the following:
- The Shelves: These are the rotating surfaces that hold your items. They can be made of wood, plastic, or metal.
- The Bearing Assembly: This is the critical mechanism that allows the shelves to rotate. It usually consists of ball bearings or a similar system.
- The Mounting Hardware: This includes the screws, brackets, and other components that secure the Lazy Susan to the cabinet.
- The Shaft (for some models): A central post that runs through the bearing assembly, providing stability and support.
Understanding these parts is the first step in diagnosing and resolving any issues you might encounter. For instance, a noisy Lazy Susan often points to problems within the bearing assembly or the mounting hardware. A sluggish spin might indicate friction or a problem with the bearings themselves.
Common Problems and Their Causes
Several factors can contribute to a noisy or malfunctioning Lazy Susan. Identifying the root cause is the key to a successful repair. Here are some of the most common issues:
- Worn Bearings: Over time, the bearings can wear down, leading to friction and noise. This is especially true in high-use kitchens.
- Debris and Dirt: Crumbs, spills, and other debris can accumulate in the bearing assembly, hindering smooth rotation and causing grinding sounds.
- Loose Mounting Hardware: Screws and brackets can loosen over time, causing the Lazy Susan to wobble or make noise.
- Uneven Weight Distribution: Overloading one side of the Lazy Susan or placing heavy items unevenly can put stress on the bearings and cause issues.
- Misalignment: If the Lazy Susan is not perfectly aligned within the cabinet, it can rub against the sides, creating friction and noise.
- Rust and Corrosion: Exposure to moisture can cause rust and corrosion, particularly in metal components, which can impede movement and generate noise.
By understanding these potential problems, you can approach the adjustment process with a clear plan.
Tools and Materials You’ll Need
Before you begin, gather the necessary tools and materials. This will ensure a smooth and efficient adjustment process. Here’s a basic list:
- Screwdriver (Phillips and/or flathead): For tightening or loosening screws.
- Wrench (adjustable or specific size): May be needed for certain mounting hardware.
- Cleaning Supplies: Such as a vacuum cleaner with a brush attachment, a damp cloth, and possibly a degreaser.
- Lubricant: Silicone-based lubricant or a suitable grease designed for bearings. Avoid using oil-based lubricants, as they can attract dirt.
- Replacement Screws (optional): If your existing screws are stripped or damaged.
- Level (optional): To ensure the Lazy Susan is properly aligned.
- Work Gloves (optional): To protect your hands.
Having these items readily available will make the adjustment process significantly easier and more effective. Remember to always disconnect power to any nearby appliances for safety.
Step-by-Step Guide to Adjusting Your Lazy Susan
Now, let’s dive into the practical steps to adjust your Lazy Susan and restore its smooth operation. Follow these instructions carefully.
Step One: Assessment and Preparation
Before you start, take a moment to assess the situation. Spin the Lazy Susan and listen carefully to identify the source of the noise. Check for any visible signs of damage, such as loose screws or misaligned components. Remove all items from the Lazy Susan shelves. This will give you clear access to the mechanism and allow you to work without obstruction.
Step Two: Cleaning the Bearing Assembly
A dirty bearing assembly is a common culprit for noise and friction. Use a vacuum cleaner with a brush attachment to remove loose debris. Then, wipe down the bearing assembly with a damp cloth to remove any remaining dirt or grime. If there’s significant grease buildup, you might need to use a degreaser. Allow the components to dry completely before proceeding.
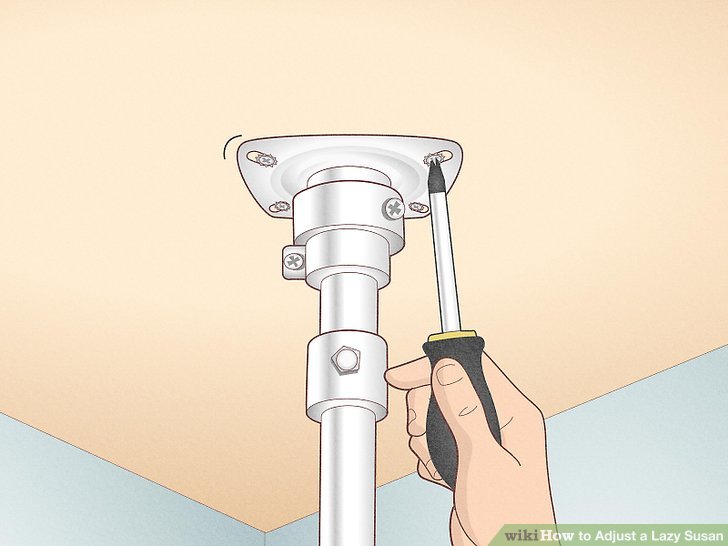
Step Three: Tightening the Mounting Hardware
Check all screws and brackets that secure the Lazy Susan to the cabinet. Use a screwdriver or wrench to tighten any loose hardware. Be careful not to overtighten, as this can damage the wood or the cabinet. If any screws are stripped, replace them with new ones. Ensure the Lazy Susan is firmly secured to the cabinet.
Step Four: Lubricating the Bearings
Once the bearing assembly is clean and the mounting hardware is secure, it’s time to lubricate the bearings. Apply a silicone-based lubricant or a suitable grease to the bearing assembly. Rotate the Lazy Susan several times to distribute the lubricant evenly. Be careful not to over-lubricate, as this can attract dirt and debris. This step is crucial for minimizing friction and ensuring smooth operation.
Step Five: Weight Distribution and Alignment
Carefully reload the Lazy Susan, ensuring that you distribute the weight evenly across the shelves. Avoid overloading one side. If you suspect misalignment, use a level to check that the Lazy Susan is properly aligned within the cabinet. Adjust the mounting hardware as needed to correct any misalignment. Proper alignment will prevent the Lazy Susan from rubbing against the cabinet walls.
Step Six: Final Test and Refinement
After completing the previous steps, give the Lazy Susan a final spin. Listen for any remaining noises or resistance. If necessary, repeat the cleaning and lubrication steps. If the problem persists, you might need to consult a professional for further assistance. A properly adjusted Lazy Susan should rotate smoothly and quietly.
Troubleshooting Common Issues
Even after following the adjustment guide, you might still encounter some issues. Here’s how to troubleshoot some common problems:
- Persistent Noise: If noise persists after cleaning, tightening, and lubricating, the bearings might be severely damaged and require replacement.
- Sluggish Rotation: If the Lazy Susan is difficult to spin, check for obstructions, such as items caught in the mechanism, or consider replacing the bearings.
- Wobbling: If the Lazy Susan wobbles, double-check the mounting hardware and the alignment. A replacement of the entire unit might be necessary if the structure is compromised.
- Sticking: If the Lazy Susan sticks in place, ensure the shelves are not catching on the cabinet walls.
For more complex issues, consider contacting a professional cabinet repair specialist. They have the expertise and tools to diagnose and resolve any problems with your Lazy Susan.
Preventative Maintenance for a Long-Lasting Lazy Susan
Preventative maintenance is key to extending the lifespan of your Lazy Susan and avoiding future problems. Here are some tips:
- Regular Cleaning: Wipe down the Lazy Susan shelves and the bearing assembly regularly to prevent the buildup of debris.
- Proper Weight Distribution: Avoid overloading the Lazy Susan and distribute weight evenly.
- Periodic Lubrication: Lubricate the bearings every six months or as needed, depending on usage.
- Inspect Regularly: Periodically inspect the Lazy Susan for any signs of wear and tear, such as loose screws or damaged bearings.
- Avoid Harsh Chemicals: When cleaning, avoid using harsh chemicals that could damage the materials.
By following these simple steps, you can keep your Lazy Susan in excellent condition for years to come.
When to Call a Professional
While many Lazy Susan issues can be resolved with the DIY guide, there are times when it’s best to call a professional. Consider contacting a cabinet repair specialist if:
- The Lazy Susan is severely damaged or broken.
- The noise persists after you’ve tried all the troubleshooting steps.
- You’re not comfortable working with tools or making repairs.
- The Lazy Susan is part of a larger cabinet system.
A professional will have the expertise and tools to diagnose the problem accurately and provide a lasting solution. Do not hesitate to seek expert help when needed.
Conclusion: Enjoying the Smooth Spin
A well-functioning Lazy Susan is a testament to efficient kitchen organization and effortless accessibility. By following this comprehensive guide, you can silence the noise, restore smooth operation, and enjoy the convenience of your Lazy Susan. Remember, regular maintenance and proactive troubleshooting are key to keeping your Lazy Susan spinning smoothly for years to come. With a little effort, you can transform a source of frustration into a seamless and silent storage solution. Enjoy the peace and quiet, and the improved functionality of your kitchen!
[See also: How to Organize Your Kitchen Cabinets, Best Kitchen Storage Solutions, DIY Kitchen Repair Guide]

