Revolutionize Your Email Communication: The Art of Managing Distribution Lists in Outlook 365
In the fast-paced digital landscape, effective communication is the cornerstone of success. Whether you’re a seasoned professional or just starting out, mastering the art of email communication is crucial. And at the heart of streamlined email efficiency lies the power of distribution lists. This article delves into the intricacies of managing distribution lists within Outlook 365, equipping you with the knowledge and techniques to revolutionize your email communication and boost your productivity.
Email, despite the rise of collaborative platforms, remains a dominant force in business communication. Internal memos, project updates, marketing campaigns, and client correspondence – all rely heavily on email. The ability to efficiently reach the right people with the right information is paramount. That’s where distribution lists in Outlook 365 come into play. Properly managed distribution lists save time, ensure consistency, and minimize errors. Let’s explore how you can transform your email workflow.
Understanding Distribution Lists: Your Email’s Secret Weapon
A distribution list, sometimes referred to as a contact group, is essentially a collection of email addresses grouped under a single name. Instead of manually entering individual email addresses every time you need to send a message to multiple recipients, you can simply address your email to the distribution list name. This simplifies the process, reduces the risk of typos, and ensures that all intended recipients receive your message.
Outlook 365 provides robust features for creating, managing, and using distribution lists. From small teams to large organizations, distribution lists can be tailored to meet specific communication needs. They are a powerful tool for internal communication, marketing campaigns, and even personal organization. Mastering the use of distribution lists is a critical step toward email efficiency.
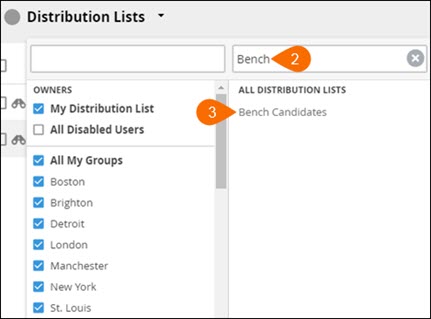
Creating and Managing Distribution Lists in Outlook 365
Creating and managing distribution lists in Outlook 365 is a straightforward process. Here’s a step-by-step guide to get you started:
- Open Outlook 365: Launch the Outlook 365 application on your computer or access it through the web browser.
- Navigate to the Contacts Section: Click on the “People” icon (usually represented by a silhouette of two people) located in the bottom left corner of the Outlook window.
- Create a New Contact Group: In the “People” view, click on “New Contact Group” (or “New Group” depending on your Outlook version) typically found in the “Home” tab of the ribbon.
- Name Your Distribution List: A new window will open. Give your distribution list a descriptive name (e.g., “Marketing Team,” “Client List,” “Project Alpha Updates”).
- Add Members: Click on “Add Members” and choose from the following options:
- From Outlook Contacts: Select individuals from your existing contact list.
- From Address Book: Search for and add people from your organization’s global address list.
- New Email Contact: Manually enter the email address and name of a new contact.
- Save the Distribution List: Once you’ve added all the desired members, click “Save & Close.”
You can now use your newly created distribution list when composing emails. Simply type the name of the list in the “To,” “Cc,” or “Bcc” fields, and Outlook 365 will automatically populate the recipient list.
Managing your distribution lists is equally important. To edit an existing list, navigate to the “People” view, double-click the list you want to modify, and add or remove members as needed. Remember to save your changes.
Best Practices for Effective Distribution List Management
While creating and using distribution lists is relatively easy, adhering to best practices will maximize their effectiveness and prevent potential communication pitfalls.
- Choose Descriptive and Consistent Names: Use names that clearly indicate the purpose of the list. This helps users easily identify the correct list when composing emails. Maintain a consistent naming convention across all your lists.
- Keep Lists Up-to-Date: Regularly review and update your distribution lists to ensure accuracy. Remove inactive members and add new ones as needed. This helps maintain data integrity and avoids sending emails to outdated addresses.
- Use “Bcc” for Privacy: When sending emails to large distribution lists, especially those containing external recipients, consider using the “Bcc” (Blind Carbon Copy) field. This protects the privacy of recipients by preventing them from seeing the email addresses of others.
- Communicate List Guidelines: If your organization has established guidelines for using distribution lists (e.g., acceptable content, frequency of emails), make sure to communicate these guidelines to all list members.
- Monitor and Analyze Email Performance: If you’re using distribution lists for marketing or promotional purposes, consider using email analytics tools to track open rates, click-through rates, and other key metrics. This will help you optimize your email campaigns and improve their effectiveness.
- Consider Segmentation: For large distribution lists, consider segmenting your audience based on demographics, interests, or other relevant criteria. This allows you to tailor your messaging and improve engagement.
Advanced Features and Troubleshooting
Outlook 365 offers several advanced features that can enhance your distribution list management capabilities.
- Dynamic Distribution Lists: For organizations using Exchange Online, dynamic distribution lists automatically update membership based on specific criteria (e.g., job title, department). This eliminates the need for manual updates and ensures that lists are always current.
- Moderated Distribution Lists: You can configure a distribution list to be moderated, meaning that all incoming messages must be approved by a designated moderator before being delivered to the list members. This helps control the content and prevent spam or inappropriate messages.
- Troubleshooting Common Issues:
- Emails Not Being Delivered: Check the recipient list for incorrect email addresses or typos. Ensure that the list is not exceeding any sending limits imposed by your email provider.
- Members Not Receiving Emails: Verify that the member’s email address is correctly listed in the distribution list. Check the member’s spam folder to see if the email was mistakenly marked as spam.
- Permissions Issues: Ensure that the sender has the necessary permissions to send emails to the distribution list. Contact your IT administrator if you’re unsure about permissions.
The Benefits of Mastering Distribution Lists
The advantages of effectively using distribution lists in Outlook 365 are numerous and far-reaching:
- Increased Efficiency: Save time and effort by sending emails to multiple recipients with a single click.
- Improved Communication: Ensure that the right information reaches the right people, leading to better collaboration and decision-making.
- Reduced Errors: Minimize the risk of typos and incorrect email addresses.
- Enhanced Organization: Simplify your email workflow and maintain a well-organized contact system.
- Streamlined Marketing: Facilitate targeted email campaigns and improve marketing ROI.
By embracing the power of distribution lists, you can transform your email communication from a time-consuming chore into a streamlined and efficient process.
Conclusion: Embrace the Power of Organized Communication
In conclusion, mastering distribution lists in Outlook 365 is a fundamental skill for anyone seeking to optimize their email communication. From creating and managing lists to implementing best practices and leveraging advanced features, the information provided equips you with the tools you need to succeed. By implementing the strategies outlined in this article, you can revolutionize your email workflow, improve your productivity, and foster more effective communication within your organization.
Don’t let email overwhelm you. Take control of your inbox and unlock the full potential of distribution lists. Start today and experience the difference that organized communication can make.
[See also: Related Article Titles]

