Restore Your Shellac Brush in Minutes: A Professional’s Guide to Reviving Your Tools
For both seasoned professionals and enthusiastic DIYers, shellac is a timeless finish, prized for its lustrous sheen and protective qualities. However, the very nature of shellac, a resin derived from the lac insect, makes it prone to hardening and clumping within brushes. This can quickly render your shellac brush unusable, leading to frustration and unnecessary expense. But before you consign your favorite brush to the trash, consider a simple, effective process to restore your shellac brush in minutes. This guide provides a comprehensive, fact-checked approach to reviving your brushes, saving you time, money, and ensuring your shellac projects are always a success.
Shellac, when exposed to air, begins to dry and solidify. This is why proper brush care is paramount. Neglecting your brushes can lead to a stiff, unusable tool. Understanding the chemistry of shellac and the proper cleaning methods is essential to successfully restore your shellac brush in minutes.
Understanding the Enemy: Why Shellac Hardens
The culprit behind a hardened shellac brush is straightforward: shellac itself. As a natural resin, shellac dries quickly through the evaporation of the solvent, typically denatured alcohol. Once the solvent is gone, the shellac solidifies, effectively gluing the bristles together. This process accelerates when the brush is left exposed to air, whether during a project or improperly stored.
Several factors contribute to the speed at which shellac dries: temperature, humidity, and airflow. Higher temperatures and lower humidity levels accelerate the drying process. Even a slight breeze can quickly dry the shellac within a brush. This makes it crucial to clean your brush promptly after use and to store it correctly.
The Essential Supplies to Restore Your Shellac Brush
Before you begin, gather the necessary supplies. Having everything at hand will streamline the process and ensure you can restore your shellac brush in minutes. You will need:
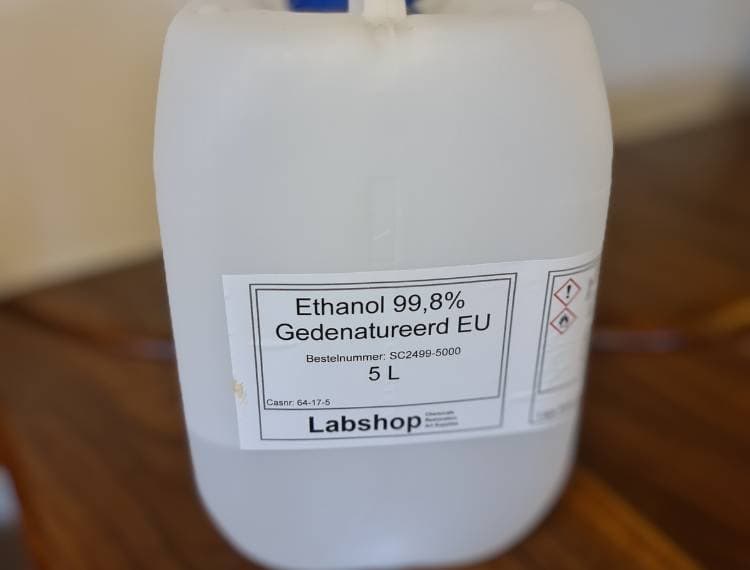
- Denatured Alcohol: This is the solvent used to dissolve shellac. Ensure you have a fresh supply.
- A Clean Container: A jar or container that is deep enough to fully submerge the bristles of your brush.
- A Wire Brush (Optional): A wire brush can help remove stubborn shellac residue.
- A Clean Rag or Paper Towels: For wiping and cleaning.
- Gloves (Recommended): To protect your skin from the alcohol.
- Eye Protection (Recommended): To prevent splashes from entering your eyes.
Step-by-Step Guide: How to Restore Your Shellac Brush in Minutes
The process of restoring a shellac brush is relatively simple, but it requires patience and attention to detail. Follow these steps carefully to achieve the best results. The goal is to dissolve the hardened shellac and bring the bristles back to their original, flexible state. With these steps, you can easily restore your shellac brush in minutes.
- Soaking the Brush: Pour denatured alcohol into the container, ensuring there is enough to submerge the bristles completely. Place the brush into the container, bristles down. Allow the brush to soak for at least 30 minutes. For severely hardened brushes, you may need to soak them for several hours or even overnight.
- Agitation: After soaking, gently agitate the brush within the alcohol. You can do this by swirling the brush around in the container or by gently tapping the bristles against the bottom. This helps to loosen and dissolve the hardened shellac.
- Brushing and Cleaning: Remove the brush from the alcohol. Use a clean rag or paper towel to wipe away the dissolved shellac. If the brush is still clumpy, use the wire brush (if you have one) to gently comb through the bristles, removing any remaining residue. Be careful not to damage the bristles.
- Rinsing: Rinse the brush in fresh denatured alcohol. This helps to remove any remaining shellac and ensures the brush is clean.
- Drying and Shaping: Gently squeeze out any excess alcohol from the bristles. Shape the bristles to their original form. Allow the brush to air dry completely, ideally in a well-ventilated area. Do not store the brush until it is completely dry.
Troubleshooting Common Issues When You Restore Your Shellac Brush
Even with careful execution, you might encounter some challenges when trying to restore your shellac brush in minutes. Here are some common issues and how to address them:
- Stubborn Shellac: If the shellac remains stubbornly hard, increase the soaking time. You may need to soak the brush overnight. You can also try using a slightly warmer (but not hot) denatured alcohol, as warmth can sometimes accelerate the dissolving process.
- Bristle Damage: If the bristles are damaged, the brush might be beyond repair. However, you can still try to salvage it by trimming any severely damaged bristles. Always use a gentle touch to avoid further damage.
- Brush Shedding: Some shedding is normal, especially after cleaning. However, excessive shedding might indicate the brush is old or damaged. If the shedding is excessive, consider replacing the brush.
Preventative Measures: Keeping Your Brushes in Top Condition
While knowing how to restore your shellac brush in minutes is invaluable, preventing the problem in the first place is even better. Proper care will extend the life of your brushes and save you time and effort. Here are some key preventative measures:
- Clean Immediately After Use: The most crucial step is to clean your brush immediately after each use. Don’t let the shellac dry in the bristles.
- Proper Storage: After cleaning, store your brushes properly. You can hang them bristles down or store them flat in a container designed for brush storage. This prevents the bristles from bending and deforming.
- Use the Right Solvent: Always use denatured alcohol to clean shellac brushes. Other solvents might damage the bristles or not be effective.
- Avoid Overloading the Brush: Don’t overload the brush with shellac. This can lead to drips and uneven application, as well as make cleaning more difficult.
Beyond the Basics: Advanced Techniques
For those looking to refine their brush care skills, here are a few advanced techniques. These techniques can help you further optimize the process to restore your shellac brush in minutes.
- Using a Brush Spinner: A brush spinner can help remove excess solvent and shellac residue after cleaning, leading to a faster drying time and a more thorough cleaning.
- Regular Inspection: Regularly inspect your brushes for signs of wear and tear. Replace brushes when necessary to ensure optimal performance.
- Dedicated Brushes: Consider using separate brushes for different shellac projects. This can help to minimize cross-contamination and make cleaning easier.
The Importance of a Well-Maintained Shellac Brush
The ability to restore your shellac brush in minutes is not just about saving money; it’s about maintaining the quality of your work. A well-maintained brush ensures a smooth, even finish and prevents imperfections. It also demonstrates a commitment to craftsmanship and attention to detail. Properly cared-for brushes are an investment in your projects.
Shellac brushes, when properly cared for, can last for years. Understanding the simple steps involved in cleaning and storing these tools will ensure your projects are always of the highest quality. Learning how to restore your shellac brush in minutes is a valuable skill for any woodworker or DIY enthusiast.
In conclusion, mastering the techniques to restore your shellac brush in minutes is an essential skill for anyone working with shellac. By following these simple steps and preventative measures, you can extend the life of your brushes, save money, and ensure your projects are always a success. Remember that taking the time to properly care for your tools is an investment in the quality of your work and your overall satisfaction. With the right knowledge and a bit of practice, you can easily restore your shellac brush in minutes and get back to creating beautiful finishes.
[See also: Related Article Titles]

