
Minecraft Server Modpack Installation: A Detailed Guide
The world of Minecraft offers unparalleled creative freedom and the potential for endless adventures. However, the vanilla experience, while enjoyable, can sometimes feel limited. This is where modpacks come in. Modpacks are curated collections of mods that drastically alter and expand the game, introducing new items, creatures, mechanics, and even entire gameplay styles. This guide provides a detailed walkthrough on Minecraft server modpack installation, ensuring a smooth and successful experience for both players and server administrators.
The appeal of modpacks is undeniable. They breathe new life into Minecraft, offering experiences ranging from industrial automation and magical exploration to complex technical challenges and role-playing opportunities. But setting up a Minecraft server modpack installation can seem daunting. This guide breaks down the process into manageable steps, making it accessible even for those new to server administration.
Understanding Modpacks and Their Benefits
Before diving into the technical aspects, it’s essential to understand what modpacks are and why they’re so popular. A modpack is essentially a pre-configured package of mods, often bundled with specific configurations and dependencies. This means players don’t have to manually search for, download, and install each individual mod, streamlining the process and ensuring compatibility. Modpacks are created and maintained by communities and individuals, providing a vast range of curated experiences.
The benefits of using modpacks are numerous:
- Enhanced Gameplay: Modpacks introduce new dimensions, items, and mechanics, significantly altering the core gameplay loop.
- Community-Driven Content: Many modpacks are developed and maintained by dedicated communities, ensuring ongoing updates and support.
- Simplified Installation: Modpacks streamline the process of adding multiple mods, reducing the risk of compatibility issues.
- Variety: There’s a modpack for almost every playstyle, from technical automation to magical exploration to pure survival.
Choosing the Right Minecraft Server Modpack
Selecting the right modpack is crucial for a positive experience. Consider these factors when making your choice:
- Your interests: What type of gameplay do you enjoy? Do you prefer building, exploration, automation, or combat? Choose a modpack that aligns with your preferences.
- Server Resources: Modpacks can be resource-intensive. Ensure your server has sufficient RAM and processing power to handle the chosen modpack.
- Community and Support: Look for modpacks with active communities and readily available support resources, such as forums and wikis.
- Compatibility: Check the compatibility of the modpack with your existing Minecraft version.
- Popularity and Reviews: Consider the popularity and reviews of the modpack to gauge its stability and overall quality.
Some popular modpacks include:
- All the Mods Series: Known for its extensive content and wide variety of mods.
- Feed The Beast (FTB): A long-standing series with a focus on technical and industrial mods.
- Sky Factory: A popular series focused on resource gathering and building in a sky-based environment.
- Create: A mod focused on creative building and automation with a unique visual style.
Preparing Your Server for Minecraft Server Modpack Installation
Before starting the Minecraft server modpack installation, you need to ensure your server is properly prepared. This involves several steps:
- Server Hosting: You’ll need a dedicated server or a hosting plan that allows for modpack installations. Several hosting providers specialize in Minecraft servers, offering pre-configured setups and easy modpack installation options.
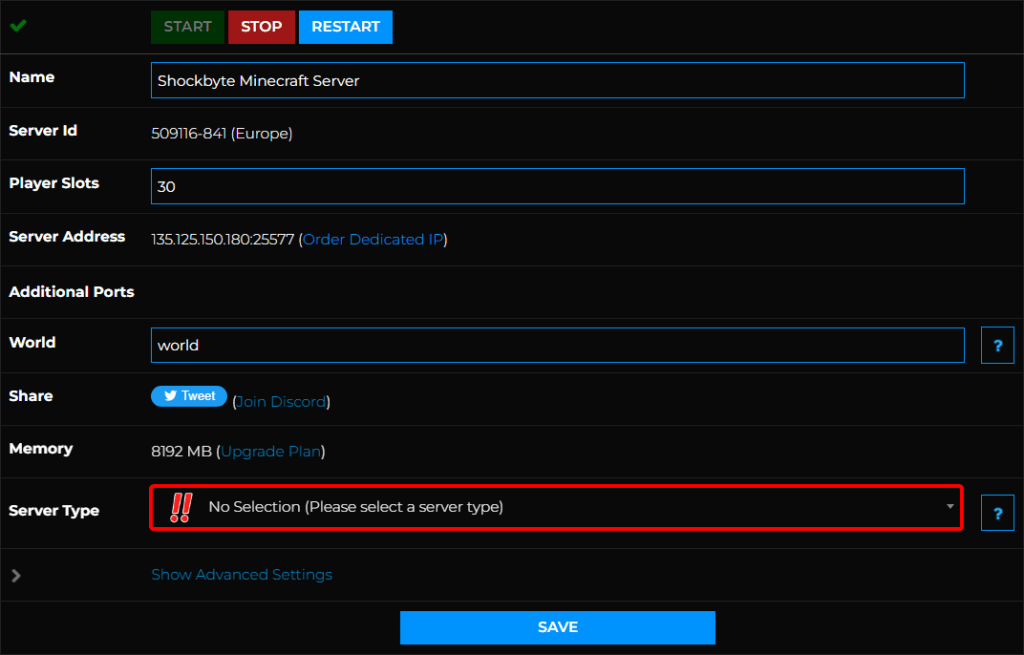
- Server Type: Ensure your server supports the Forge or Fabric mod loader, depending on the modpack’s requirements. Most modpacks utilize Forge.
- Java Installation: Make sure you have the correct version of Java installed on your server. The modpack documentation will specify the required Java version.
- Backup: Create a backup of your server files before making any changes. This will allow you to revert to a previous state if something goes wrong during the Minecraft server modpack installation.
- Server Files Access: You’ll need access to your server files, usually through an FTP client or a file manager provided by your hosting provider.
Step-by-Step Minecraft Server Modpack Installation Guide
The Minecraft server modpack installation process typically involves these steps. Specific instructions may vary slightly depending on the modpack and hosting provider.
- Download the Modpack: Obtain the modpack files. This is usually done through a launcher like CurseForge (formerly Twitch), GDLauncher, or the modpack’s official website. The download will often include a server-side file that is needed.
- Upload the Server Files: Use an FTP client or file manager to upload the modpack server files to your server. This typically involves overwriting existing server files, so be sure to back up your data first.
- Configure the Server: Edit the server.properties file to configure basic settings, such as the server name, difficulty, and game mode. Make sure the ‘server-ip’ is set correctly, which is usually the IP address of your server.
- Start the Server: Launch the server. The server will initialize the modpack and generate the necessary files. You may need to create a start.bat file (Windows) or a start.sh file (Linux) with the correct command line arguments, which is usually provided with the server files.
- Check the Logs: Monitor the server console or log files for any errors. These logs are invaluable for troubleshooting and identifying potential issues.
- Connect to the Server: Launch your Minecraft client and select the appropriate modpack profile. Enter your server’s IP address and connect.
Troubleshooting Common Issues During Minecraft Server Modpack Installation
Even with careful planning, you may encounter issues during the Minecraft server modpack installation. Here are some common problems and their solutions:
- Server Fails to Start: Check the server logs for error messages. Common causes include incorrect Java versions, missing dependencies, or corrupted files.
- Client-Side Issues: Make sure your client-side modpack installation matches the server-side. Double-check that you’ve installed the correct modpack and version.
- Out of Memory Errors: Increase the amount of RAM allocated to the server. This is usually done through the start.bat or start.sh file.
- Mod Conflicts: Some mods may conflict with each other. Consult the modpack’s documentation or community forums for solutions.
- Incorrect Server Address: Double-check that you are using the correct IP address or domain name for your server.
Optimizing Your Minecraft Server for Performance
Once you’ve completed the Minecraft server modpack installation, you’ll want to optimize your server for performance to ensure a smooth gameplay experience. Here are some tips:
- Allocate Sufficient RAM: The most crucial step. The amount of RAM required depends on the modpack and the number of players. Start with the recommended amount and increase it as needed.
- Optimize Server Tick Rate: A lower tick rate can improve performance, but it may affect gameplay mechanics. Experiment to find the optimal balance.
- Disable Unnecessary Features: Disable features like weather effects or mob spawns if they’re not essential.
- Monitor Server Resources: Use server monitoring tools to track CPU usage, memory usage, and disk I/O. This will help you identify bottlenecks.
- Consider a Powerful CPU: A strong CPU is essential for handling the complex calculations involved in modded Minecraft.
- Keep the Server Updated: Regularly update the server software and the modpack to benefit from performance improvements and bug fixes.
Advanced Tips and Considerations for Minecraft Server Modpack Installation
Beyond the basics, there are advanced techniques that can further improve your Minecraft server modpack installation and management:
- Use a Dedicated Server: A dedicated server provides more control and resources than shared hosting.
- Configure the Server.properties File: Fine-tune server settings, such as view distance and simulation distance, to optimize performance.
- Utilize Server Plugins: Plugins can add various functionalities, such as anti-cheat measures, world protection, and administrative tools.
- Regular Backups: Implement a robust backup schedule to protect your server data.
- Stay Informed: Keep up-to-date with the latest news and developments in the Minecraft modding community.
- Community Involvement: Engage with the modpack community to get help and share your experiences.
Installing a modpack on a Minecraft server expands the game’s possibilities and provides new ways to enjoy the experience. With this guide, you should be well-equipped to handle the Minecraft server modpack installation process, troubleshoot any issues, and optimize your server for a smooth and enjoyable gaming experience. Remember to always back up your server files and consult the modpack’s documentation for specific instructions and compatibility details.
The Minecraft server modpack installation process, while requiring some technical know-how, is a rewarding endeavor. The ability to customize your gameplay experience with a wide variety of mods can significantly enhance your enjoyment of the game. The initial setup, including Minecraft server modpack installation, might seem complex, but the benefits far outweigh the effort. Proper planning, careful execution, and a willingness to learn are key to successful Minecraft server modpack installation. Ultimately, the most important factor is to find a modpack that suits your preferences and enjoy the adventure that awaits. Following these steps, and remembering to consult the modpack’s specific instructions, will ensure a successful Minecraft server modpack installation. The world of modded Minecraft is vast and exciting, offering endless possibilities for creativity, exploration, and fun. Enjoy your enhanced Minecraft journey!
Minecraft server modpack installation is an essential skill for anyone looking to expand their Minecraft experience. By following this comprehensive guide, you’ll be well on your way to creating a customized and engaging Minecraft server for yourself and your friends.
[See also: Minecraft Server Hosting Guide, How to Choose the Best Minecraft Mods, Troubleshooting Common Minecraft Server Errors]

