Knitting Gauge: The Unsung Hero of Every Knitted Creation
In the intricate world of knitting, where needles dance and yarn transforms into wearable art, a seemingly simple concept holds the key to success: knitting gauge. Often overlooked by beginners, and sometimes even seasoned knitters, gauge is the secret ingredient that separates a beautifully crafted garment from a misshapen, ill-fitting disaster. This article delves deep into the importance of knitting gauge, providing you with the knowledge and techniques to master this crucial skill and elevate your knitting projects to new heights.
What Exactly is Knitting Gauge?
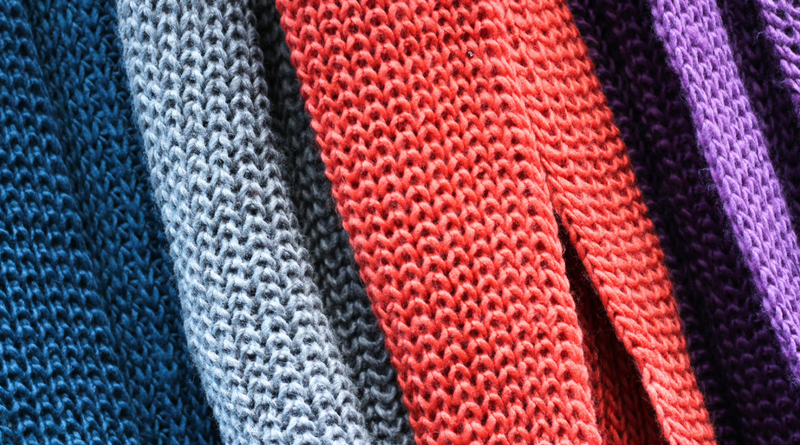
At its core, knitting gauge refers to the number of stitches and rows you knit per a specific unit of measurement, typically four inches (10 cm). This measurement is critical because it dictates the size and fit of your finished project. Think of it as a blueprint for your knitting. Without accurate gauge, your sweater might end up too small, your scarf too wide, or your blanket an unexpected size. Essentially, knitting gauge is the density of your knitting.
Gauge is usually expressed as “stitches and rows per 4 inches.” For example, a pattern might specify a gauge of 20 stitches and 28 rows per 4 inches in stockinette stitch. This means that when you knit a swatch of stockinette stitch (knit one row, purl one row) and measure a 4-inch square, you should have 20 stitches across and 28 rows high. Achieving this gauge ensures your project will be the correct size according to the pattern.
Why Does Knitting Gauge Matter So Much?
The consequences of ignoring knitting gauge can be frustrating and disheartening. Imagine spending hours, even weeks, knitting a beautiful sweater, only to find it doesn’t fit. This is a common experience for knitters who haven’t taken the time to check their gauge. Here’s why it’s so vital:
- Accurate Sizing: Patterns are designed with a specific gauge in mind. If your gauge is different, your finished project will be a different size.
- Yarn Usage: Gauge affects how much yarn you’ll need. If your gauge is tighter than the pattern, you might run out of yarn.
- Project Appearance: Gauge impacts the overall look and drape of your project. A looser gauge can make the fabric more open and drapey, while a tighter gauge creates a denser fabric.
- Pattern Integrity: Following a pattern relies on achieving the correct gauge. Without it, the design elements of the pattern, such as cables, lace, or colorwork, might not look as intended.
Understanding the Factors That Influence Gauge
Several factors can impact your knitting gauge. Recognizing these influences allows you to make adjustments and achieve the desired results. Here are some of the most significant:
- Needle Size: This is the most significant factor. Different needle sizes will produce different gauges. Thinner needles typically create a tighter gauge, while thicker needles create a looser gauge.
- Yarn Weight: The thickness of the yarn also plays a crucial role. Heavier yarns generally require larger needles and produce a looser gauge, while finer yarns require smaller needles and yield a tighter gauge.
- Knitting Style: Everyone knits differently. Some knitters tension their yarn tightly, while others knit more loosely. This personal knitting style significantly affects gauge.
- Stitch Pattern: Different stitch patterns (stockinette, garter, ribbing, etc.) have varying levels of elasticity and can affect your gauge.
- Tension Consistency: Maintaining consistent tension throughout your knitting is essential for accurate gauge. Avoid tightening or loosening your stitches randomly.
- Blocking: Blocking, the process of washing and shaping your finished knitted item, can also affect gauge, especially with certain yarns.
How to Check Your Knitting Gauge
Checking your knitting gauge is a simple, yet essential, process. Here’s how to do it:
- Knit a Swatch: Cast on enough stitches to knit a swatch that is at least 6 inches wide and 6 inches high. Follow the pattern’s recommended stitch pattern (usually stockinette stitch) and use the recommended needle size.
- Knit to the Specified Height: Knit until your swatch is at least 6 inches high.
- Wash and Block (if applicable): If the pattern specifies, wash and block your swatch. This step is crucial, as it allows the yarn to relax and the stitches to settle, which can significantly alter your gauge.
- Measure Your Gauge: Lay your swatch flat on a surface. Using a gauge ruler or a measuring tape, measure a 4-inch square in the center of your swatch. Count the number of stitches and rows within that 4-inch square.
- Compare to the Pattern: Compare your measurements to the gauge specified in the pattern.
- Adjust if Necessary: If your gauge doesn’t match the pattern, you’ll need to adjust your needle size. If your gauge is too tight (more stitches and rows per 4 inches than the pattern), try a larger needle size. If your gauge is too loose (fewer stitches and rows per 4 inches than the pattern), try a smaller needle size.
- Knit a New Swatch: After changing your needle size, knit a new swatch to ensure you’ve achieved the correct gauge. Repeat this process until your gauge matches the pattern.
Troubleshooting Common Gauge Issues
Even with careful attention, gauge can sometimes be off. Here are some common issues and how to address them:
- Gauge is too tight: Use larger needles. Knit more loosely.
- Gauge is too loose: Use smaller needles. Knit more tightly.
- Inconsistent tension: Practice knitting with consistent tension. Try to relax and find a rhythm.
- Different yarn: If you’re using a different yarn than the pattern recommends, you may need to adjust your needle size or the pattern itself.
- Blocking changes the gauge: Always block your gauge swatch the same way you plan to block your finished project.
Advanced Techniques for Gauge Mastery
Once you’ve mastered the basics, you can explore more advanced techniques to refine your gauge control:
- Swatching with the project yarn: Always swatch with the yarn you intend to use for your project. This is the most accurate way to determine your gauge.
- Experimenting with needle materials: Different needle materials (bamboo, metal, wood) can affect your gauge. Try experimenting to see what works best for you and the yarn you’re using.
- Using stitch markers: Place stitch markers at regular intervals in your swatch to help you maintain consistent tension.
- Reading the pattern carefully: Pay close attention to the pattern’s gauge instructions and any notes about the yarn or needles used.
By understanding and consistently practicing these techniques, you’ll become a knitting gauge expert.
The Rewards of Accurate Gauge
The time and effort invested in achieving accurate knitting gauge are well worth it. You’ll enjoy the satisfaction of creating beautifully fitting garments and projects that match your expectations. You’ll also avoid the frustration of ripping out hours of work and wasting precious yarn. Accurate gauge is the foundation of successful knitting, allowing you to explore complex patterns, experiment with different yarns, and express your creativity with confidence.
Beyond the Basics: Gauge in Different Knitting Styles
The principles of knitting gauge remain constant regardless of the type of knitting you’re doing, but some styles may require a slightly different approach. For instance, in lace knitting, where the fabric’s openwork design is crucial, achieving the correct gauge is especially important. Similarly, in colorwork projects, the tension of each color needs to be consistent to prevent puckering or unevenness. Fair Isle knitting, for example, needs to have tight, consistent tension and accurate gauge to prevent the floats on the back from being too loose.
Embracing the Journey: A Lifelong Learning Process
Mastering knitting gauge is not a destination but a journey. It’s a skill that improves with practice and experience. Embrace the process, be patient with yourself, and don’t be afraid to experiment. With each project, you’ll gain a deeper understanding of your own knitting style and the nuances of gauge. And, most importantly, enjoy the process of creating something beautiful with your own two hands.
By prioritizing knitting gauge, you unlock a world of possibilities in the world of knitting. You’ll be able to confidently tackle any pattern, create projects that fit perfectly, and experience the true joy of knitting. So, grab your needles, yarn, and gauge ruler, and embark on a journey to improve your technique today! Remember, the key to a perfect project lies in understanding and achieving the perfect knitting gauge.
[See also: Best Knitting Needles for Beginners] [See also: Yarn Weight Guide: Choosing the Right Yarn for Your Project] [See also: How to Read a Knitting Pattern]

