Golf Cart Brakes: A Simple DIY Repair Guide for Smooth Stopping
The gentle hum of an electric motor, the open air, and the effortless glide across the fairway – these are the hallmarks of the golf cart experience. But what happens when that smooth ride is interrupted by sluggish brakes or a complete failure to stop? For many golf cart owners, the prospect of dealing with brake issues can seem daunting. However, with a little know-how and the right tools, a golf cart brakes repair can be a manageable DIY project. This guide will walk you through the process, helping you understand the common problems, diagnose the issues, and perform simple repairs to ensure your golf cart stops safely and reliably.
Understanding Golf Cart Brake Systems
Before diving into repairs, it’s crucial to understand the basic components of a golf cart brakes system. Most golf carts utilize either drum brakes or disc brakes, similar to those found in automobiles. Drum brakes, typically found on older models, consist of brake shoes that press against a rotating drum to create friction. Disc brakes, more common on newer carts, use calipers to squeeze brake pads against a rotor. Both systems rely on a hydraulic system, which transmits force from the brake pedal to the wheels.
Key components of a golf cart brakes system include:
- Brake Pedal: The control point for applying the brakes.
- Master Cylinder: A hydraulic pump that pressurizes the brake fluid.
- Brake Lines: Hoses and pipes that carry brake fluid to the wheels.
- Calipers (Disc Brakes) or Wheel Cylinders (Drum Brakes): These components house the brake pads or shoes and apply pressure to the rotors or drums.
- Rotors (Disc Brakes) or Drums (Drum Brakes): The rotating surfaces that the brake pads or shoes press against.
- Brake Pads/Shoes: Friction materials that create the stopping force.
Common Golf Cart Brake Problems
Several issues can arise with golf cart brakes. Recognizing these problems early can prevent more significant damage and ensure your safety. Here are some common issues:
- Spongy Brakes: This indicates air in the brake lines, which reduces braking efficiency.
- Brakes Grinding: This often signifies worn brake pads or shoes, or damage to the rotors or drums.
- Brakes Pulling to One Side: This suggests uneven brake pressure, possibly due to a stuck caliper or contamination on one side.
- Reduced Braking Power: This could be caused by several factors, including worn pads/shoes, leaks in the hydraulic system, or a faulty master cylinder.
- Brake Pedal Going to the Floor: This typically points to a significant leak in the brake system.
Tools and Materials You’ll Need
Before starting any golf cart brakes repair, gather the necessary tools and materials. The specific items will depend on the type of repair you’re undertaking, but here’s a general list:
- Jack and Jack Stands: Essential for safely lifting and supporting the golf cart.
- Wheel Chocks: To prevent the cart from rolling.
- Wrench Set: Including both metric and SAE sizes.
- Screwdrivers: Both Phillips head and flathead.
- Brake Cleaner: To remove dirt, grease, and brake dust.
- New Brake Pads or Shoes: Match the replacement parts to your cart’s make and model.
- Brake Fluid: Use the type recommended in your cart’s manual.
- Bleeder Wrench: For bleeding the brakes.
- Bleeder Hose: To direct brake fluid away from the brakes.
- Gloves: To protect your hands.
- Safety Glasses: To protect your eyes.
Step-by-Step DIY Brake Repair: A Simplified Guide
This guide provides a simplified overview of a common golf cart brakes repair, such as replacing brake pads or shoes. Always consult your golf cart’s service manual for specific instructions and torque specifications. Safety first!
Step 1: Preparation and Safety
Park the golf cart on a level surface and engage the parking brake. Chock the rear wheels to prevent movement. Use the jack to lift the front or rear of the cart (depending on the brakes you are working on) and secure it with jack stands. Always ensure the cart is stable before working underneath.
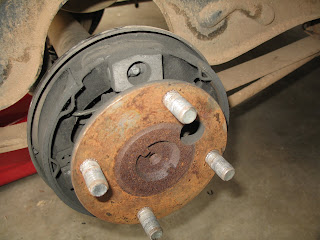
Step 2: Removing the Wheel and Brake Components
Remove the wheel from the side you’re working on. For disc brakes, carefully remove the caliper from the rotor. This usually involves removing two bolts. For drum brakes, remove the drum after removing the wheel. This might require removing a retaining clip or adjusting the brake shoes.
Step 3: Inspecting and Replacing Brake Pads/Shoes
Inspect the brake pads or shoes. If they are worn down to the wear indicators or less than a few millimeters thick, they need replacement. Remove the old pads/shoes and install the new ones, ensuring they are seated correctly. For disc brakes, compress the caliper piston using a C-clamp or a specialized tool before installing the new pads. For drum brakes, clean the inside of the drum and replace the shoes, ensuring the springs are correctly positioned.
Step 4: Reassembling the Brakes
Reattach the caliper (disc brakes) or drum (drum brakes). Torque the bolts to the specifications in your service manual. Reinstall the wheel.
Step 5: Bleeding the Brakes
This is a crucial step to remove any air trapped in the brake lines. Locate the bleeder screw on the caliper or wheel cylinder. Attach the bleeder hose to the screw and submerge the other end in a container of brake fluid. Have an assistant pump the brake pedal several times, then hold it down. Open the bleeder screw to release air and fluid. Close the screw before the pedal reaches the floor. Repeat this process until no air bubbles are visible in the hose. Add brake fluid to the master cylinder as needed to prevent air from entering the system.
Step 6: Testing the Brakes
Once the brakes are bled, test them thoroughly. Start the golf cart and slowly apply the brakes. Ensure they are firm and provide adequate stopping power. Drive the cart slowly in a safe area and test the brakes at different speeds. Check for any pulling or unusual noises.
Troubleshooting Common Brake Issues
Even with careful repairs, problems can sometimes persist. Here are some troubleshooting tips for common issues related to golf cart brakes:
- Spongy Brakes Persist: Re-bleed the brakes, ensuring there are no leaks in the system. Check the master cylinder for leaks.
- Brakes Still Grinding: Double-check the brake pads or shoes for proper installation and wear. Inspect the rotors or drums for damage.
- Brakes Pull to One Side: Inspect the calipers or wheel cylinders for sticking. Check for leaks or contamination on one side.
- Reduced Braking Power: Check for leaks, worn pads/shoes, and air in the brake lines. Ensure the brake fluid is the correct type and in good condition. The master cylinder may need replacement.
When to Seek Professional Help
While many golf cart brakes repairs are manageable for DIY enthusiasts, certain issues require professional attention. If you encounter any of the following, it’s best to consult a qualified mechanic:
- Major Hydraulic Leaks: Leaks in the master cylinder, brake lines, or calipers can be difficult to diagnose and repair.
- ABS (if equipped) Issues: Anti-lock braking systems require specialized knowledge and diagnostic tools.
- Severe Brake Damage: Significant damage to rotors, drums, or calipers may require specialized equipment or replacement.
- Persistent Problems: If you’ve tried several repairs and the problems persist, a professional diagnosis is recommended.
Maintaining Your Golf Cart Brakes
Regular maintenance is key to preventing golf cart brakes issues. Here are some tips:
- Regular Inspection: Inspect your brakes regularly (every few months or before each golf season) for wear, leaks, and any unusual noises.
- Brake Fluid Flush: Replace the brake fluid every two years or as recommended in your cart’s manual.
- Brake Pad/Shoe Replacement: Replace brake pads or shoes when they reach the wear indicators or the minimum thickness specified in your service manual.
- Professional Servicing: Consider having your golf cart brakes professionally serviced periodically, especially if you use your cart frequently or in demanding conditions.
Safety First: Always Prioritize Safe Braking
Properly functioning brakes are essential for your safety and the safety of others. Always prioritize safety when working on golf cart brakes. If you are unsure about any step of the repair process, consult a professional mechanic. Regular maintenance and timely repairs will ensure your golf cart stops smoothly and reliably, allowing you to enjoy your time on the course or around the neighborhood.
Conclusion
Repairing your golf cart brakes can be a rewarding and cost-effective DIY project. By understanding the components, recognizing common problems, and following these steps, you can keep your golf cart stopping safely. Remember to prioritize safety, consult your service manual, and seek professional help if needed. With the right knowledge and tools, you can confidently tackle golf cart brakes maintenance and enjoy a worry-free ride.
[See also: Related Article Titles]

