
DIY Tiki Boat: Maximize Value, Minimize Costs – Your Guide to Floating Paradise
The allure of a relaxing day on the water, cocktail in hand, surrounded by the vibrant ambiance of a tropical paradise, is a dream for many. While commercially available tiki boats offer this experience, the price tag can often be a significant barrier. However, the spirit of DIY (Do-It-Yourself) allows for an accessible and rewarding alternative: building your own DIY tiki boat. This guide will delve into the practicalities of constructing a DIY tiki boat, focusing on how to maximize value and minimize costs without compromising on the fun and functionality of your floating haven. We’ll explore everything from design considerations to material selection and essential safety precautions, providing a comprehensive roadmap for your own DIY tiki boat project.
Planning Your DIY Tiki Boat Adventure
Before diving into the construction phase, meticulous planning is crucial for the success of your DIY tiki boat. This stage involves defining your vision, understanding local regulations, and creating a realistic budget. A well-defined plan will not only keep you on track but also prevent costly mistakes down the line.
Defining Your Vision and Needs
What will you use your DIY tiki boat for? Is it primarily for leisurely cruises, entertaining guests, or perhaps a combination of both? The answer to this question will influence the size, design, and features of your boat. Consider factors like the number of passengers you’ll typically accommodate, the desired amenities (bar, seating, sound system), and the type of water you’ll be navigating (lake, river, calm coastal waters). A clear vision will help you make informed decisions throughout the project. Remember to prioritize safety and stability above all else.
Understanding Local Regulations
Navigating the legal landscape is essential. Research the boating regulations in your area. This includes requirements for registration, safety equipment (life jackets, fire extinguishers, navigation lights), and operator licenses. Failure to comply with these regulations can lead to fines and even the impoundment of your DIY tiki boat. Contact your local boating authority for a comprehensive list of requirements. Planning ahead ensures your project remains compliant and safe.
Creating a Realistic Budget
Building a DIY tiki boat can be a cost-effective endeavor, but it’s vital to create a realistic budget. Research the cost of materials, including lumber, flotation devices, fasteners, paint, and any desired amenities. Factor in the cost of tools you may need to purchase or rent. Contingency funds are crucial, as unexpected expenses often arise during a DIY project. Prioritize your spending based on your needs and wants. Consider repurposing materials to further minimize costs. Detailed budgeting prevents overspending and helps you stay within your financial means.
Designing Your DIY Tiki Boat
Once you have a solid plan, it’s time to design your DIY tiki boat. The design phase involves selecting a suitable hull design, choosing the right materials, and considering the overall layout and aesthetics.
Choosing a Hull Design
The hull is the structural foundation of your boat. The design you choose will greatly influence stability, performance, and ease of construction. Common options for a DIY tiki boat include:
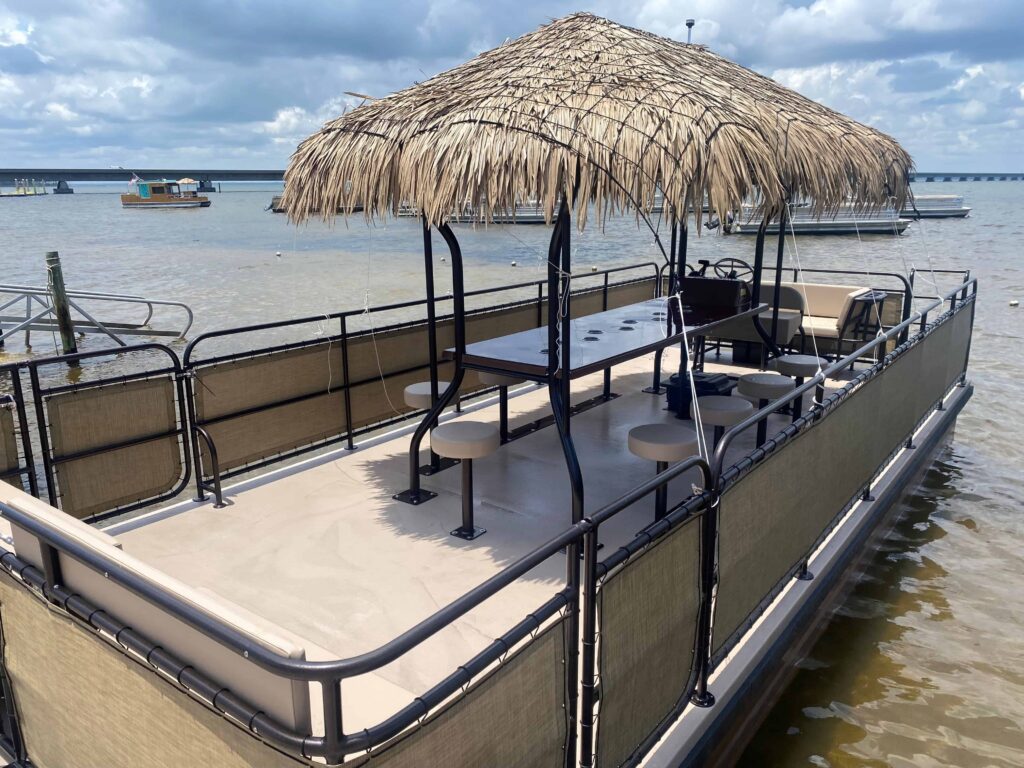
- Pontoon Hulls: These are the most popular choice due to their inherent stability and ease of construction. They typically consist of two or more pontoons (often made from repurposed barrels or commercially available pontoons) connected by a deck.
- Flat-Bottom Hulls: Simpler to build than pontoon boats, flat-bottom hulls are suitable for calm waters. They offer good stability but may not handle rough conditions as well.
- Canoe or Kayak-Based Hulls: For smaller, more agile tiki boats, repurposing canoes or kayaks can be a creative option. However, this approach generally limits passenger capacity.
Consider the intended use of your boat and the water conditions when choosing a hull design. For maximum stability, pontoon hulls are generally recommended. This will help you maximize value.
Selecting Materials
The choice of materials significantly impacts both cost and durability. Here’s a breakdown of common material choices:
- Flotation: Pontoons can be constructed from various materials, including plastic barrels (recycled for cost savings), commercially available pontoon floats (more durable and reliable), or even sealed airtight containers. Ensure your flotation provides sufficient buoyancy to support the weight of the boat, passengers, and equipment.
- Decking: Pressure-treated lumber is a durable and weather-resistant option for the deck. Other options include composite decking (more expensive but low-maintenance) or marine-grade plywood (requires sealing and painting).
- Framing: Pressure-treated lumber is also suitable for framing the deck and supporting any structures. Choose durable and weather-resistant wood.
- Fasteners: Use stainless steel or marine-grade fasteners to prevent corrosion.
- Exterior: Consider using weather-resistant paint, stain, or sealant to protect the wood and enhance the aesthetic appeal.
Careful material selection is key to the longevity and structural integrity of your DIY tiki boat. This is one of the most important steps to maximize value.
Layout and Aesthetics
Plan the layout of your boat to optimize space and functionality. Consider the placement of seating, a bar area, storage compartments, and any other desired features. Think about the flow of movement and how people will interact on the boat. Incorporating tiki-themed aesthetics, such as bamboo accents, thatched roofing, and colorful decorations, will enhance the overall ambiance. Prioritize safety when designing the layout, ensuring clear pathways and minimizing trip hazards. Creating a visually appealing and functional layout will elevate the experience on your DIY tiki boat.
Building Your DIY Tiki Boat: Step-by-Step Guide
With a detailed plan and design in place, it’s time to begin the construction phase. This section provides a step-by-step guide to help you build your own DIY tiki boat. Remember to prioritize safety throughout the process.
Step 1: Constructing the Hull
If using pontoons, secure them to a sturdy frame. This frame will determine the shape and size of your boat. If using a flat-bottom hull, construct the hull according to your chosen design. Ensure all connections are watertight. Double-check the integrity of your hull to ensure it can support the weight of the boat and its passengers.
Step 2: Building the Deck
Frame the deck using pressure-treated lumber. Ensure the frame is securely attached to the hull. Install the decking material, leaving appropriate gaps for drainage. Consider adding a non-slip surface to the deck to prevent accidents.
Step 3: Adding Structures and Amenities
Build any desired structures, such as a bar, seating, or a tiki hut roof. Use appropriate fasteners and ensure all structures are securely attached to the deck. Install desired amenities, such as a sound system, lighting, and a cooler. Consider the placement of these items to ensure they don’t interfere with navigation or safety.
Step 4: Finishing Touches and Aesthetics
Apply a weather-resistant finish to the wood. Add any desired decorative elements, such as bamboo accents, thatch roofing, or colorful paint. Install navigation lights and any other required safety equipment. Consider adding a railing for safety, especially if you have children or pets. These finishing touches are essential to the overall aesthetic of your DIY tiki boat.
Maximizing Value and Minimizing Costs: Smart Strategies
Building a DIY tiki boat is all about making smart choices to maximize value and minimize costs. Here are some strategies to help you achieve this:
Sourcing Materials Economically
Shop around for the best prices on materials. Compare prices at different lumberyards, hardware stores, and online retailers. Consider purchasing materials in bulk if you have the storage space. Explore the possibility of using recycled or repurposed materials, such as old barrels or pallets. This can significantly reduce your costs. Look for sales and discounts. Make sure to use any coupons or promotions that are available. This is one of the best ways to minimize costs.
DIY vs. Professional Services
Determine which aspects of the project you can handle yourself and which might be better left to professionals. While the goal is to minimize costs by doing the majority of the work, some tasks, such as electrical wiring or welding, may require specialized skills and equipment. Hiring a professional for these tasks can ensure safety and quality. Balancing DIY with professional help can be a smart way to save money without compromising on safety or quality. Consider how comfortable you are with the various aspects of the construction process.
Repurposing and Upcycling
Embrace the spirit of repurposing and upcycling. Look for materials that can be reused or given a new life. Old barrels can be repurposed as pontoons, pallets can be used for decking or framing, and scrap wood can be used for decorative accents. This approach not only reduces costs but also adds a unique character to your DIY tiki boat. This is a great way to maximize value and create a truly unique boat.
Safety First: Essential Considerations
Safety should be your top priority throughout the entire DIY tiki boat project. Here are some essential safety considerations:
- Flotation: Ensure your boat has adequate flotation to support the weight of everyone on board, even in the event of a capsize.
- Life Jackets: Always have enough life jackets for everyone on board, and ensure they are properly fitted and accessible.
- Fire Extinguisher: Keep a readily accessible fire extinguisher on board.
- Navigation Lights: Install navigation lights if you plan to operate your boat at night or in low-visibility conditions.
- First-Aid Kit: Carry a well-stocked first-aid kit.
- Weather Awareness: Check the weather forecast before heading out on the water and be prepared for changing conditions.
- Operator Competency: Ensure the operator is familiar with boating safety regulations and has the necessary skills to operate the boat safely.
Prioritizing safety will ensure that your DIY tiki boat provides years of enjoyment.
Maintaining Your DIY Tiki Boat
Regular maintenance is crucial for the longevity of your DIY tiki boat. Here are some tips for keeping your boat in top condition:
- Regular Inspections: Inspect the hull, deck, and all structures regularly for any signs of damage or wear and tear.
- Cleaning: Clean your boat regularly to remove dirt, debris, and algae.
- Wood Protection: Apply a fresh coat of sealant or paint as needed to protect the wood from the elements.
- Storage: Store your boat properly during the off-season to protect it from the elements.
Proper maintenance will help you maximize value and enjoy your DIY tiki boat for years to come.
Conclusion: Your Floating Paradise Awaits
Building a DIY tiki boat is a rewarding project that allows you to create a unique and personalized floating paradise. By carefully planning, designing, and building your boat, and by implementing smart strategies to maximize value and minimize costs, you can enjoy the thrill of the open water without breaking the bank. Remember to prioritize safety and have fun throughout the process. With dedication and attention to detail, you can create a DIY tiki boat that provides years of enjoyment and unforgettable memories. [See also: Building a Floating Dock: A Comprehensive Guide]

