Demystifying TAR.GZ in Linux: The Ultimate Guide to File Management
In the ever-evolving landscape of computing, efficient file management is paramount. Linux, the ubiquitous operating system powering everything from servers to smartphones, offers a powerful suite of tools to accomplish this. Among these, tar.gz files stand out as a cornerstone of archiving and compression. This comprehensive guide aims to demystify the tar.gz format, providing a clear, concise, and practical understanding of its functionality and usage. We’ll delve into the core concepts, explore the command-line tools, and equip you with the knowledge to confidently manage tar.gz archives in your Linux environment. This is the ultimate guide to understanding and mastering tar.gz in Linux.
Understanding the Basics: What is TAR.GZ?
Before diving into the technicalities, it’s crucial to grasp the fundamental concepts. A tar.gz file, often referred to as a .tar.gz or .tgz file, is essentially an archive that bundles multiple files and directories into a single file. The term tar refers to the archiving process, which stands for “tape archive.” Originally designed for creating backups on magnetic tapes, tar has evolved into a versatile tool for file consolidation.
The .gz extension signifies that the archive has been compressed using the GNU zip (gzip) algorithm. This compression significantly reduces the file size, making it easier to store, transmit, and share files. Therefore, a tar.gz file is the result of two distinct operations: archiving (using tar) and compression (using gzip). Understanding this duality is key to effectively manipulating these archives.
The Power of the Command Line: Essential Commands
The command line is the heart and soul of Linux, and it’s where the magic of tar.gz manipulation truly happens. The tar command, with its various options, is the primary tool for working with these archives. Let’s explore the most important commands and their functions.
Creating a TAR.GZ Archive
The core command for creating a tar.gz archive involves the following syntax:
tar -czvf archive_name.tar.gz directory_or_file1 directory_or_file2 ...Let’s break down each part:
tar: The command itself.-c: This option tellstarto create a new archive.-z: This option indicates that you want to compress the archive using gzip.-v: This option enables verbose mode, displaying the files being added to the archive.-f archive_name.tar.gz: Specifies the name of the archive file you want to create (e.g.,my_files.tar.gz). The-foption *must* be followed by the archive’s filename.directory_or_file1 directory_or_file2 ...: These are the names of the directories or files you want to include in the archive. You can specify multiple files and directories, separated by spaces.
For example, to create an archive named “backup.tar.gz” containing the directory “/home/user/documents”, you would use the following command:
tar -czvf backup.tar.gz /home/user/documentsThis command creates a tar.gz archive, which is a compressed archive. This is a common method of archiving. Remember, the tar.gz format is a standard in Linux, and understanding how to create these archives is fundamental to effective system administration.
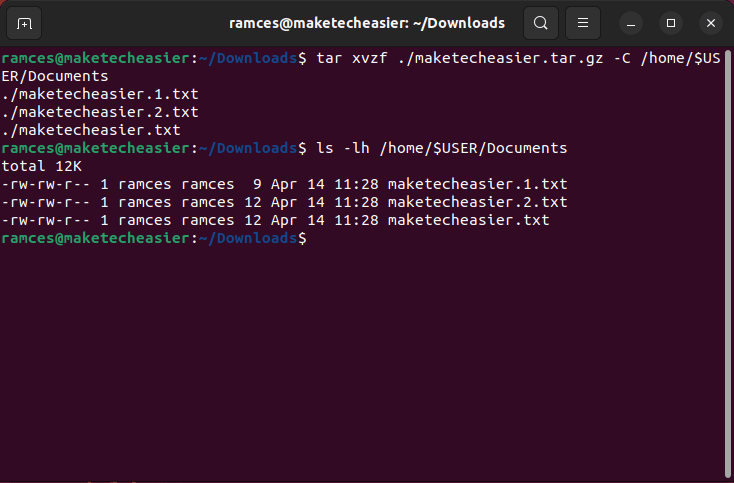
Extracting a TAR.GZ Archive
Extracting the contents of a tar.gz archive is just as straightforward. The command syntax is as follows:
tar -xzvf archive_name.tar.gzLet’s break down the options:
tar: The command itself.-x: This option tellstarto extract files from an archive.-z: This option indicates that the archive is compressed with gzip.-v: This option enables verbose mode, displaying the files being extracted.-f archive_name.tar.gz: Specifies the name of the archive file you want to extract.
For example, to extract the contents of “backup.tar.gz” into the current directory, you would use the following command:
tar -xzvf backup.tar.gzThe extracted files and directories will be placed in the current directory by default. You can use the -C option to specify a different extraction directory. For instance, tar -xzvf backup.tar.gz -C /home/user/extracted_files will extract the archive’s contents into the “/home/user/extracted_files” directory.
Listing the Contents of a TAR.GZ Archive
Sometimes, you might want to see what’s inside a tar.gz archive without extracting it. The tar command provides a way to do this as well:
tar -tzvf archive_name.tar.gzLet’s break down the options:
tar: The command itself.-t: This option tellstarto list the contents of the archive.-z: This option indicates that the archive is compressed with gzip.-v: This option enables verbose mode, displaying the files being listed.-f archive_name.tar.gz: Specifies the name of the archive file.
For example, to list the contents of “backup.tar.gz”, you would use the following command:
tar -tzvf backup.tar.gzThis command will display a list of all files and directories contained within the archive, along with their permissions, sizes, and modification dates. This is a useful tool for verifying the contents before extraction, or for simply browsing the archive’s structure. The use of tar.gz files for backups makes this listing feature particularly valuable.
Advanced Techniques and Options
While the core commands are essential, tar offers a range of advanced options that can significantly enhance your file management capabilities. Let’s explore some of them.
Excluding Files and Directories
You can exclude specific files or directories from being included in a tar.gz archive using the --exclude option. This is particularly useful when creating backups, as you might want to exclude temporary files, log files, or other unnecessary data.
The syntax is as follows:
tar -czvf archive_name.tar.gz --exclude="file_or_directory_to_exclude" directory_or_fileFor example, to create an archive of the “/home/user/documents” directory, but exclude the “temp” directory, you would use:
tar -czvf backup.tar.gz --exclude="/home/user/documents/temp" /home/user/documentsYou can use multiple --exclude options to exclude multiple files and directories. This level of control allows for highly customized backups and archiving strategies.
Working with Different Compression Algorithms
While gzip is the most common compression method for tar.gz files, tar supports other compression algorithms as well. For example, you can use bzip2 (.tar.bz2) or xz (.tar.xz) for potentially better compression ratios.
To use bzip2, use the -j option instead of the -z option:
tar -cjvf archive_name.tar.bz2 directory_or_fileTo use xz, use the -J option:
tar -cJvf archive_name.tar.xz directory_or_fileRemember that the -z option is specifically for gzip compression, which is the core of the tar.gz format. While other methods exist, understanding tar.gz remains crucial.
Preserving File Permissions and Ownership
By default, tar preserves file permissions and ownership when creating archives. However, you can use the --preserve-permissions and --owner options to explicitly control this behavior. These options are especially important when backing up or restoring files, as they ensure that the files and directories are restored with their original attributes.
Practical Examples and Use Cases
Let’s look at some practical examples and use cases to solidify your understanding of tar.gz files.
Creating a Backup of Your Home Directory
Creating regular backups is crucial for data protection. Here’s how to create a tar.gz backup of your home directory:
tar -czvf home_backup.tar.gz /home/your_usernameReplace “your_username” with your actual username. This command creates a compressed archive of your entire home directory, including all your files, directories, and settings. It’s a good practice to store these backups in a safe location, such as an external hard drive or a cloud storage service.
Compressing a Large Directory for Sharing
If you need to share a large directory with someone, creating a tar.gz archive is an efficient way to do it. The compression reduces the file size, making it easier to transfer the data. This is a very common application of tar.gz files.
tar -czvf project_files.tar.gz /path/to/your/project/directoryThis command creates a compressed archive of the specified directory. You can then share the resulting .tar.gz file via email, a file-sharing service, or any other method.
Extracting Files from a Downloaded Archive
Many software packages and data sets are distributed as tar.gz files. To extract the contents, simply use the tar -xzvf command:
tar -xzvf downloaded_archive.tar.gzThis will extract the files into the current directory. This is a fundamental skill for any Linux user, and understanding how to work with tar.gz files is essential.
Troubleshooting Common Issues
While tar.gz is generally straightforward, you might encounter some common issues. Here are some troubleshooting tips.
Incorrect Syntax
Double-check your command syntax. The order of the options is important. Ensure that the -f option (for specifying the archive filename) is followed by the filename itself. Typos are a common source of errors.
Permissions Issues
If you are unable to create or extract an archive, it might be due to insufficient permissions. Make sure you have the necessary read and write permissions for the files and directories involved. You might need to use sudo to run the command with elevated privileges if you are working with system files.
File Corruption
If you suspect that an archive is corrupted, try extracting it again. If the error persists, the archive might be damaged. In such cases, you might need to restore the files from a backup or try to recover the data using specialized tools. However, with proper handling, tar.gz files are generally reliable.
Best Practices for Managing TAR.GZ Files
To ensure efficient and reliable file management, follow these best practices:
- Use Descriptive Filenames: Choose meaningful filenames for your
tar.gzarchives to easily identify their contents. - Regular Backups: Implement a regular backup strategy to protect your data.
tar.gzis a great tool for this. - Verify Archives: After creating an archive, verify its contents using the
tar -tzvfcommand. - Store Backups Securely: Keep your backups in a safe and secure location, such as an external hard drive or cloud storage.
- Understand the Options: Familiarize yourself with the various
taroptions to tailor your file management to your specific needs.
Conclusion: Mastering TAR.GZ for Linux Proficiency
The tar.gz format is an indispensable tool in the Linux ecosystem. By understanding the fundamental concepts, mastering the command-line commands, and following best practices, you can effectively manage your files, create backups, and share data with ease. This guide has provided a comprehensive overview of tar.gz, from the basic principles to advanced techniques. The ability to create and manipulate tar.gz archives is a fundamental skill for any Linux user, and it will significantly enhance your overall system administration capabilities. Understanding tar.gz is a key element in becoming a proficient Linux user. [See also: Best Practices for Linux File Management]
Remember to practice these commands regularly to solidify your knowledge. With practice and understanding, you will be able to leverage the power of tar.gz for efficient and reliable file management in your Linux environment. This tar.gz guide has provided all the information needed to master this important skill. Now go forth and conquer tar.gz!

