Window Tint Drying Time: Everything You Need to Know
Getting your car windows tinted is a fantastic way to enhance its appearance, protect your interior, and improve your comfort. However, the process isn’t quite as simple as applying the film and driving away. One of the most critical aspects of a successful window tint installation is the window tint drying time. This guide provides a comprehensive look at everything you need to know about window tint drying time, ensuring you get the best possible results.
The window tint drying time is the period after installation when the tint film adheres to the glass and the water used during the application process evaporates. Understanding this crucial phase is essential for preventing bubbles, hazing, and other imperfections that can ruin the look of your new tint. Ignoring the recommended window tint drying time can lead to costly repairs and a less-than-satisfactory outcome.
Understanding the Window Tinting Process
Before diving into the specifics of window tint drying time, let’s briefly review the window tinting process itself. Typically, a professional installer will:
- Clean the windows thoroughly to remove any dirt, grease, or debris.
- Cut the tint film to fit the specific shape and size of your car windows.
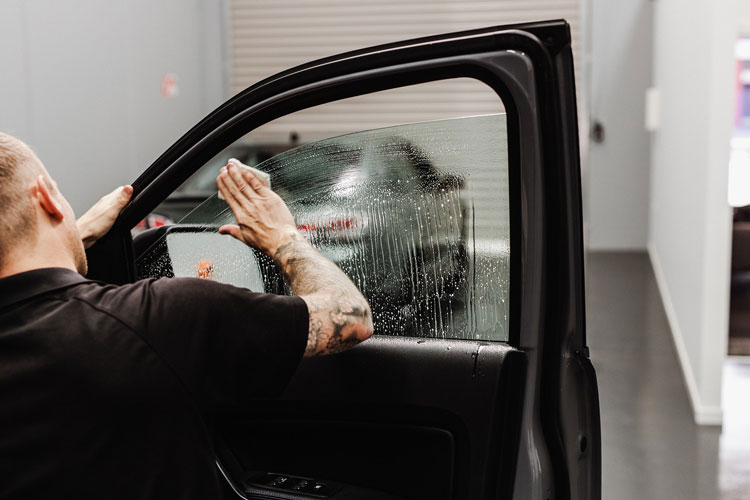
- Apply a soapy water solution to both the window and the adhesive side of the tint film. This solution acts as a lubricant, allowing the film to be positioned correctly and preventing air bubbles.
- Carefully position the tint film on the window.
- Use a squeegee to remove the water and air bubbles trapped between the film and the glass.
- Trim any excess film around the edges of the window.
The final step is the drying process, where the window tint drying time comes into play.
Factors Influencing Window Tint Drying Time
Several factors can affect how long it takes for window tint to dry. Understanding these variables is crucial for managing your expectations and ensuring a flawless finish. These factors include:
Type of Tint Film
Different types of window tint films have varying drying characteristics. Dyed films, which are the most basic and affordable type, may dry faster than higher-end films like ceramic or carbon tints. Ceramic tints, known for their superior heat rejection and durability, often require a longer window tint drying time due to their more complex composition.
Weather Conditions
Weather plays a significant role in window tint drying time. Hot, sunny weather can accelerate the drying process, while cold, humid conditions can slow it down. The ideal conditions for drying are typically warm and dry, allowing the water to evaporate efficiently. Avoid tinting your windows during periods of extreme humidity or cold weather, if possible.
Humidity Levels
High humidity can significantly prolong the window tint drying time. The presence of moisture in the air inhibits the evaporation of water trapped between the film and the glass. If you live in an area with high humidity, be prepared for a longer drying period.
Sunlight Exposure
Direct sunlight can help to speed up the drying process. However, excessive exposure to direct sunlight, especially immediately after installation, can sometimes cause the tint to bubble or blister. It’s best to allow the tint to dry gradually, with moderate sunlight exposure during the initial drying period.
Window Size and Shape
Larger windows, or windows with complex curves, may require a longer window tint drying time. The more surface area there is to dry, the longer it will take for the water to evaporate completely. Curved windows can also trap more water, extending the drying time.
Professional Installation
The skill of the installer can also impact the drying time. A professional installer will use the correct techniques and tools to minimize the amount of water trapped under the film, which can speed up the drying process and prevent potential issues.
How Long Does Window Tint Drying Take?
The typical window tint drying time ranges from a few days to a week or more. However, this is just a general guideline, and the actual drying time will depend on the factors mentioned above. In most cases, you can expect the following:
- Initial Drying (24-72 Hours): During this period, the tint will appear hazy or cloudy. This is normal, as the water is still evaporating. Avoid rolling down your windows during this time.
- Complete Drying (1-4 Weeks): The tint should become clear and free of bubbles or imperfections. The exact time frame depends on the factors mentioned above.
What to Expect During the Drying Process
During the window tint drying time, you’ll likely notice a few things:
- Hazing or Cloudiness: This is a common occurrence and is caused by the water trapped between the film and the glass. The haziness will gradually disappear as the water evaporates.
- Small Bubbles: These bubbles are also caused by trapped water and air. Most small bubbles will disappear over time. However, if the bubbles are large or persistent, it may indicate a problem with the installation.
- Water Streaks: These streaks are also normal and will disappear as the film dries.
Care and Maintenance During the Drying Period
To ensure a successful drying process and a long-lasting tint, it’s essential to follow these care and maintenance tips during the window tint drying time:
- Avoid Rolling Down Windows: This is the most crucial step. Rolling down your windows during the drying period can disrupt the film and cause it to peel or bubble.
- Keep Windows Clean: Avoid cleaning your windows for at least a week after installation. After the initial week, use a soft cloth and a mild, ammonia-free cleaner to wipe the windows.
- Avoid Using Harsh Chemicals: Harsh chemicals can damage the tint film. Stick to ammonia-free cleaners specifically designed for window tint.
- Park in the Shade: While moderate sunlight is beneficial, excessive direct sunlight can sometimes cause problems. Park your car in the shade, especially during the hottest parts of the day.
- Monitor for Issues: Keep an eye on your windows for any signs of peeling, bubbling, or other imperfections. If you notice any issues, contact your installer for advice.
Troubleshooting Common Issues
Even with the best care, you may encounter some issues during the window tint drying time. Here’s how to address some common problems:
Bubbles
Small bubbles often disappear on their own during the drying process. However, if the bubbles are large or persistent, they may indicate trapped air or a problem with the installation. Contact your installer for advice if the bubbles do not disappear after a few weeks.
Hazing
Hazing is normal during the initial drying period. It should gradually disappear as the water evaporates. If the hazing persists for more than a few weeks, it may indicate a problem with the film or installation. Contact your installer for assistance.
Peeling
If the tint starts to peel, it likely indicates a problem with the installation or the adhesive. Contact your installer immediately to address the issue. Peeling can often be fixed, but it’s important to act quickly.
Long-Term Care for Your Tinted Windows
Once the window tint drying time is complete, and your tint is fully cured, proper care will ensure its longevity and maintain its appearance. Here are some additional tips for long-term care:
- Clean Regularly: Clean your windows regularly with a soft cloth and a mild, ammonia-free cleaner.
- Avoid Abrasive Cleaners: Abrasive cleaners can scratch the tint film.
- Use a Squeegee: When cleaning, use a soft squeegee to prevent streaks and ensure a clear view.
- Protect from Scratches: Avoid placing sharp objects near the windows, as they can scratch the film.
- Inspect Regularly: Regularly inspect your tinted windows for any signs of damage or wear and tear.
By following these care tips, you can enjoy the benefits of your window tint for years to come.
Conclusion: Patience is Key
The window tint drying time is a critical phase in the window tinting process. By understanding the factors that influence drying time and following the recommended care instructions, you can ensure a flawless finish and enjoy the benefits of your tinted windows. Patience is key during this period. Give your tint the time it needs to dry completely, and you’ll be rewarded with a beautiful and functional result. The investment in quality window tint and proper installation, coupled with understanding the window tint drying time, will pay off in the long run, providing enhanced comfort, protection, and style for your vehicle. Remember, the best results come from a combination of quality materials, skilled installation, and a little bit of patience during the window tint drying time.
[See also: How to Choose the Right Window Tint for Your Car]
[See also: Window Tinting: Benefits and Considerations]
[See also: DIY vs. Professional Window Tinting: Which is Right for You?]

