
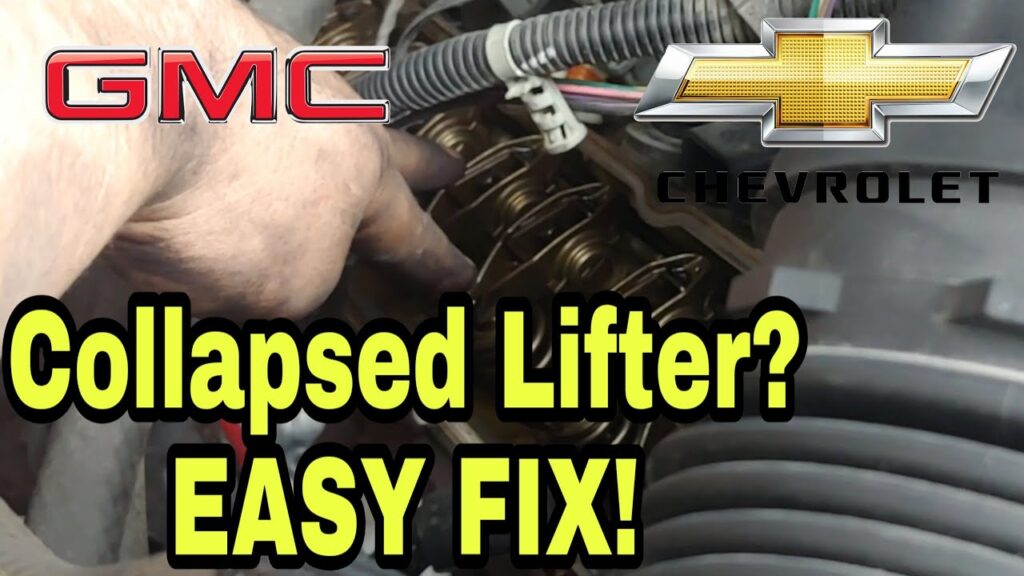
5.3 Chevy Lifter Replacement: A Weekend Project?
The rumble of a Chevy 5.3 engine is a familiar soundtrack for many, a testament to its robust performance and widespread use. But even the most reliable engines require maintenance, and one common issue that can arise is a faulty lifter. The question for many owners then becomes: can a 5.3 Chevy lifter replacement be undertaken as a weekend project? This article delves into the complexities of this repair, providing a comprehensive guide to help you determine if you’re up to the task, and what to expect if you decide to proceed. We’ll explore the necessary steps, the potential pitfalls, and the tools required, allowing you to make an informed decision about your 5.3 Chevy lifter replacement.
Understanding the 5.3 Chevy Lifter
Before diving into the repair itself, it’s crucial to understand the role of lifters in your 5.3 Chevy engine. Lifters, also known as valve lifters or tappets, are critical components of the valvetrain. They sit between the camshaft and the valves, transferring the camshaft’s rotational motion into the opening and closing of the engine’s valves. This precise timing is essential for the engine’s efficient combustion and overall performance. The 5.3 Chevy engine typically uses hydraulic lifters, which rely on oil pressure to maintain constant contact with the camshaft and valve stems, ensuring quiet and efficient operation. When a lifter fails, it can manifest in several ways, including a noticeable ticking noise, reduced engine power, misfires, and even a check engine light.
Identifying the Symptoms of a Bad Lifter
Diagnosing a faulty lifter is the first, and arguably, the most critical step. While a ticking noise is often the most obvious symptom, it’s not always a definitive indicator. Other potential causes for ticking noises could be low oil pressure, exhaust leaks, or even loose rocker arms. Therefore, careful observation and a systematic approach are necessary. Here’s a breakdown of the common symptoms associated with a failing 5.3 Chevy lifter:
- Ticking Noise: This is the most prevalent symptom. The ticking sound usually increases with engine speed and may disappear when the engine warms up or at higher RPMs.
- Misfires: A collapsed lifter can prevent a valve from opening or closing properly, leading to a misfire in one or more cylinders.
- Rough Idle: A misfiring cylinder will often cause the engine to idle roughly.
- Reduced Engine Power: The impaired valve function can significantly reduce engine performance.
- Check Engine Light: A misfire will trigger the check engine light, and diagnostic codes will often point to a specific cylinder or valve issue.
To properly diagnose a bad lifter, you can use a stethoscope to pinpoint the source of the ticking. Remove the valve covers and visually inspect the rocker arms. A loose rocker arm or excessive play can indicate a collapsed lifter. A compression test on each cylinder can also help identify a cylinder with a valve issue. Further diagnostic steps, such as using a scan tool to check for misfire codes, can help confirm the diagnosis before beginning the 5.3 Chevy lifter replacement.
Is a 5.3 Chevy Lifter Replacement a DIY Project?
The answer to this question depends heavily on your mechanical aptitude, the tools you have available, and your willingness to invest time and effort. A 5.3 Chevy lifter replacement is not a simple job, but it’s also not necessarily a job that *requires* a professional mechanic. With the right preparation and a methodical approach, many experienced DIYers can successfully complete this repair. However, several factors need to be considered before you commit to the project.
Pros of DIY 5.3 Chevy Lifter Replacement:
- Cost Savings: Labor costs at a repair shop can be significant. Doing the work yourself can save a considerable amount of money.
- Learning Experience: This is a great opportunity to expand your mechanical knowledge and skills.
- Control: You control the pace, the parts used, and the overall quality of the repair.
Cons of DIY 5.3 Chevy Lifter Replacement:
- Time Commitment: The repair can take a full weekend, or even longer, depending on your experience and any unforeseen complications.
- Tools and Equipment: You’ll need a variety of tools, including a torque wrench, valve spring compressor, and potentially a harmonic balancer puller.
- Potential for Mistakes: If the job is not done correctly, it can lead to further engine damage.
- Complexity: The 5.3 Chevy lifter replacement requires a good understanding of engine mechanics and the valvetrain system.
If you have limited mechanical experience, lack the necessary tools, or are uncomfortable working on your engine, it’s best to seek professional assistance. However, if you are mechanically inclined and prepared to invest the time and effort, a 5.3 Chevy lifter replacement can be a rewarding DIY project.
Tools and Parts Needed for the 5.3 Chevy Lifter Replacement
If you’ve decided to tackle the 5.3 Chevy lifter replacement yourself, you’ll need to gather the correct tools and parts. This section outlines the essential items you’ll need. Failing to have the correct tools and parts will significantly increase the difficulty and potential for errors.
- New Lifters: This is the primary component you’re replacing. Ensure you purchase the correct lifters for your specific 5.3 Chevy engine model and year. Consider upgrading to performance lifters for improved engine performance.
- Valve Cover Gaskets: These gaskets are essential for sealing the valve covers and preventing oil leaks.
- Intake Manifold Gaskets: The intake manifold will need to be removed to access the lifters, so new gaskets are required.
- Head Bolts (Optional, but Recommended): It’s a good practice to replace the head bolts when working on the valvetrain.
- Torque Wrench: This is crucial for tightening bolts to the correct specifications.
- Valve Spring Compressor: This tool is necessary to remove and install the valve springs.
- Socket Set and Wrenches: A comprehensive set of sockets and wrenches is essential for removing and installing various engine components.
- Pry Bar: Useful for prying components, such as the intake manifold, loose.
- Harmonic Balancer Puller: May be needed to remove the harmonic balancer, providing better access to the front of the engine.
- Breaker Bar: Provides leverage for removing stubborn bolts.
- Shop Rags and Cleaner: Keep your work area clean and remove oil and debris.
- Oil and Filter: You’ll need to change the oil and filter after the repair.
Before you begin, create a detailed parts list and order all the necessary components. This will prevent delays and ensure you have everything you need to complete the 5.3 Chevy lifter replacement. Careful preparation is key to a successful outcome.
Step-by-Step Guide to 5.3 Chevy Lifter Replacement
This section provides a general overview of the steps involved in a 5.3 Chevy lifter replacement. Remember that specific procedures may vary slightly depending on your vehicle’s year and model. Always consult a repair manual specific to your vehicle for detailed instructions. This guide is for informational purposes only.
- Disconnect the Battery: Safety first! Disconnect the negative battery cable to prevent any electrical shorts.
- Drain the Coolant: Drain the coolant from the radiator.
- Remove the Air Intake: Remove the air intake components to access the intake manifold.
- Remove the Intake Manifold: Carefully remove the intake manifold, disconnecting any necessary sensors and wiring.
- Remove the Valve Covers: Remove the valve covers, being careful not to damage the gaskets.
- Remove the Rocker Arms: Loosen and remove the rocker arms. Keep them in order to ensure proper reassembly.
- Remove the Pushrods: Carefully remove the pushrods and label them according to their location.
- Compress the Valve Springs: Use a valve spring compressor to compress the valve springs.
- Remove the Lifters: Using a magnet or other appropriate tool, remove the old lifters.
- Install the New Lifters: Install the new lifters, ensuring they are properly seated.
- Reassemble the Valvetrain: Reinstall the pushrods, rocker arms, and valve springs, following the manufacturer’s torque specifications.
- Install the Valve Covers and Intake Manifold: Replace the gaskets and reinstall the valve covers and intake manifold.
- Reconnect Sensors and Wiring: Ensure all sensors and wiring are reconnected.
- Refill the Coolant: Refill the coolant system.
- Change the Oil and Filter: Complete the repair with a fresh oil and filter change.
- Reconnect the Battery: Reconnect the battery and start the engine.
- Check for Leaks: After starting the engine, carefully check for any leaks.
This step-by-step guide provides a general overview. Always refer to your vehicle’s repair manual for specific instructions and torque specifications during your 5.3 Chevy lifter replacement.
Potential Complications and Troubleshooting
While the 5.3 Chevy lifter replacement can be a straightforward process, several potential complications can arise. Being aware of these issues and knowing how to troubleshoot them can save you time and frustration.
- Stripped Bolts: Be careful not to overtighten bolts, particularly those in aluminum components. If a bolt strips, you may need to use a thread repair kit.
- Broken Bolts: If a bolt breaks, you’ll need to extract the broken piece.
- Oil Leaks: Ensure all gaskets are properly installed and torqued to prevent oil leaks. Check the valve covers and intake manifold after the repair.
- Engine Misfires: If misfires persist after the 5.3 Chevy lifter replacement, double-check your work, including the spark plugs, wires, and coil packs.
- Incorrect Valve Timing: Make sure you reassemble the valvetrain correctly.
- Camshaft Damage: In some cases, a failing lifter can damage the camshaft. Inspect the camshaft for wear.
If you encounter any problems during the 5.3 Chevy lifter replacement, stop and assess the situation. Consult your repair manual and online resources for guidance. If you are unsure of a step, it’s always best to consult a professional mechanic.
Post-Replacement Considerations and Maintenance
Once you’ve successfully completed the 5.3 Chevy lifter replacement, there are a few important considerations to ensure the longevity of your engine and the success of your repair. Proper maintenance is crucial to preventing future lifter failures and maintaining optimal engine performance. After the 5.3 Chevy lifter replacement, consider the following:
- Oil Choice: Use the correct type and weight of oil recommended by the manufacturer. Consider using a high-quality synthetic oil for improved engine protection.
- Oil Changes: Follow the recommended oil change intervals. Regular oil changes are essential for removing contaminants and maintaining oil pressure.
- Oil Filter: Use a high-quality oil filter to effectively remove debris and contaminants.
- Avoid Over-Revving: Avoid unnecessary high RPM operation, especially when the engine is cold.
- Regular Inspections: Regularly inspect your engine for any signs of leaks or unusual noises.
By following these maintenance guidelines, you can help prevent future issues and keep your 5.3 Chevy engine running smoothly for years to come. Taking the time to perform proper maintenance after your 5.3 Chevy lifter replacement can save you money and ensure your engine’s long-term health.
Conclusion: Is it a Weekend Project?
So, can you complete a 5.3 Chevy lifter replacement as a weekend project? The answer is: it depends. If you possess the mechanical aptitude, the necessary tools, and the time to dedicate to the task, it’s certainly achievable. However, if you’re a novice mechanic or lack the proper resources, it may be best to consult a professional. The key is to carefully assess your skills, prepare thoroughly, and follow the correct procedures. If you’re prepared, the 5.3 Chevy lifter replacement can be a rewarding experience, saving you money and expanding your knowledge of your vehicle. If not, don’t hesitate to seek professional help. The health of your engine, and a successful outcome, is the most important thing. Remember that the success of your 5.3 Chevy lifter replacement hinges on preparation, patience, and a commitment to doing the job right. [See also: Related Article Titles]
Ultimately, the decision to undertake a 5.3 Chevy lifter replacement as a weekend project is a personal one. Weigh the pros and cons carefully, and make the choice that’s right for you and your vehicle. Good luck!

